


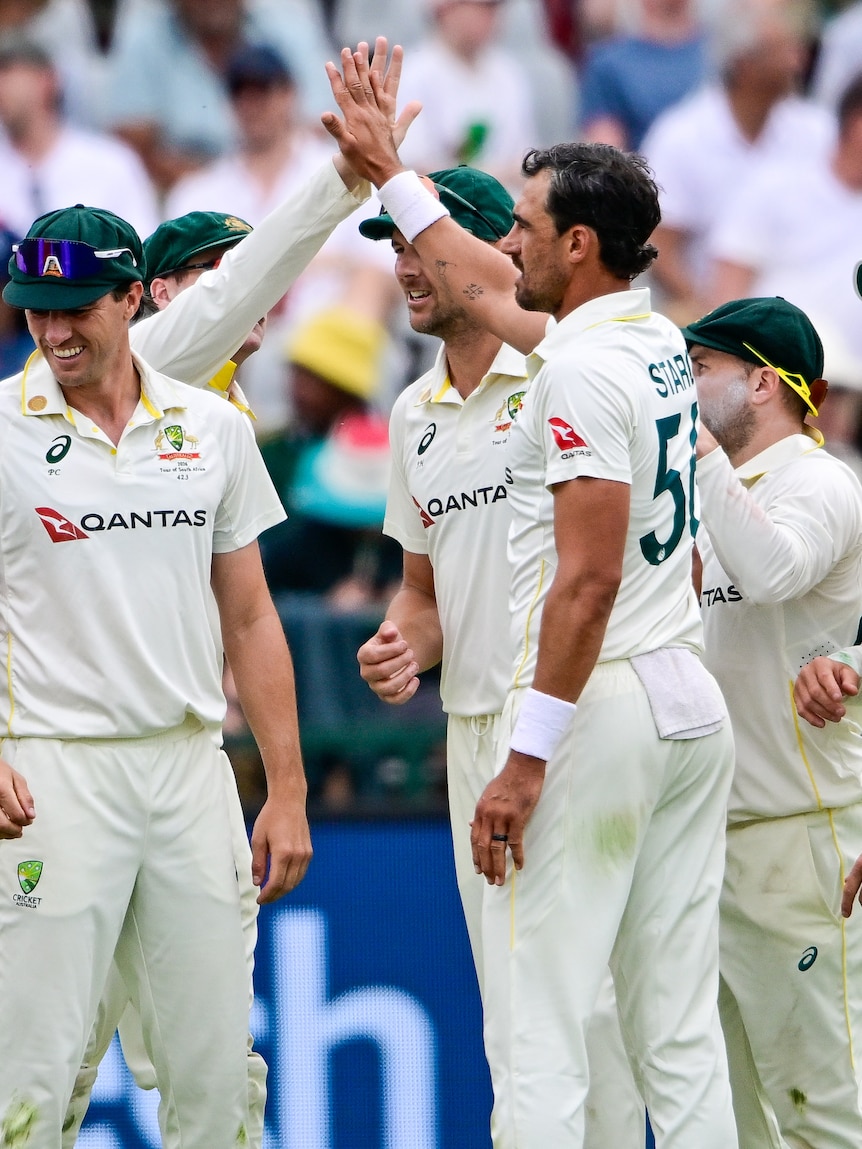
Mitchell Starc has dragged Australia back into the third Test against South Africa after a stunning spell with the second new ball.
The home side mustered 329 after being sent in by Pat Cummins, but lost its last four wickets for just two runs as Starc found swing with the new ball to blow away the tail.
Starc finished with figures of 6-72 from 16.3 overs to allow Australia to share the spoils after a pulsating day of Test cricket.
Days of Test cricket are rarely split in half, but day one at Newlands could definitively split in two as South Africa handed Australia a lifeline after throwing away a promising position.
Throughout the opening session the Proteas were absolutely cruising, a morning’s play that simply couldn’t have gone worse for the tourists.
Steve Smith had been ruled out before play had even started, failing a fitness test on his troublesome neck.
Travis Head dropped a sitter to reprieve Aiden Markram off the bowling of a ropable Starc.
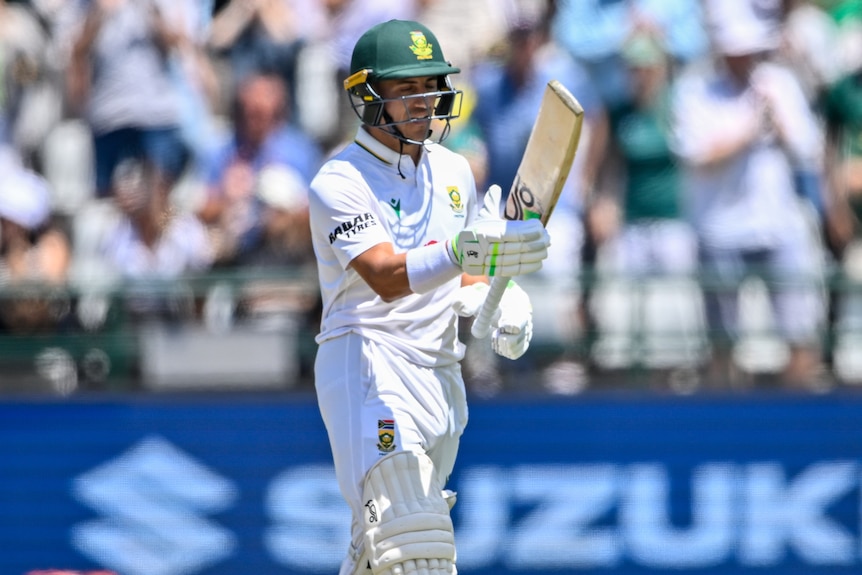
Marques Ackerman helped put South Africa in the driver’s seat early on day one, but fell five runs short of his maiden Test century. (Getty Images: Ashley Vlotman/Gallo Images)
The Proteas were scoring at over five runs per over, with openers Aiden Markram and Marques Ackerman powering their way to 0-158 not long after lunch.
Pat Cummins’s decision to bowl first on a placid deck looked misguided.
But Nathan Lyon, preferred to Scott Boland in one of four changes made by the Aussies, made the breakthrough that precipitated a collapse of epic proportions.
Ackerman advanced down the pitch and was beaten by Lyon, with Alex Carey completing a regulation stumping.
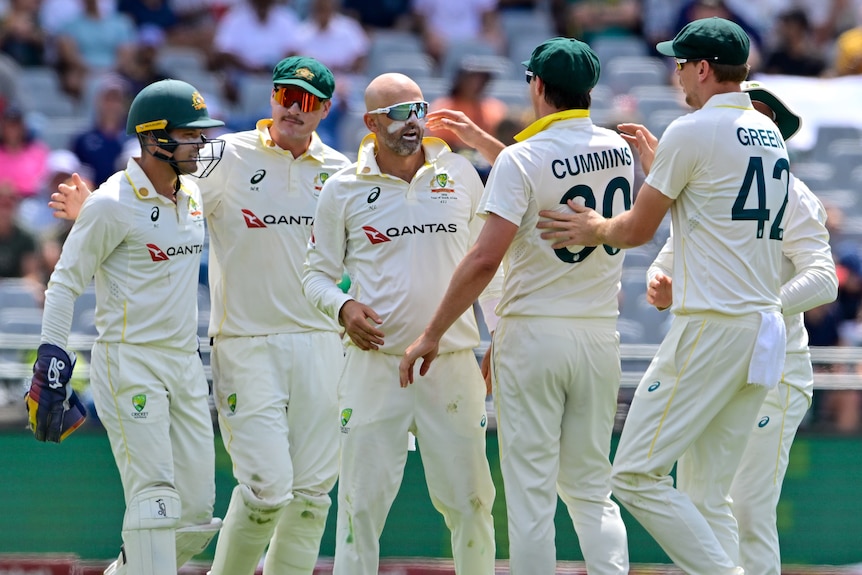
Nathan Lyon (centre) picked up two first innings wickets on his return to the Test side. (Getty Images: Ashley Vlotman/Gallo Images)
The collapse was not immediate, with Markham and David Bedingham combining for a 45-run partnership.
But Markram (75) was dismissed hooking Josh Hazlewood, superbly caught by Starc on the backward square leg boundary which started the South African’s slide.
Skipper Temba Bavuma was bowled by Lyon for a two-ball duck, with Matthew Breetzke trapped LBW by Cooper Connolly for 2 as the Proteas lost 3-13 in the space of seven overs.
Starc then struck twice in the space of a single over, Bedingham (50) hooking to Hazlewood on the boundary before Wiaan Mulder (0) walked without waiting for a decision just two balls later after edging a hook to Carey.
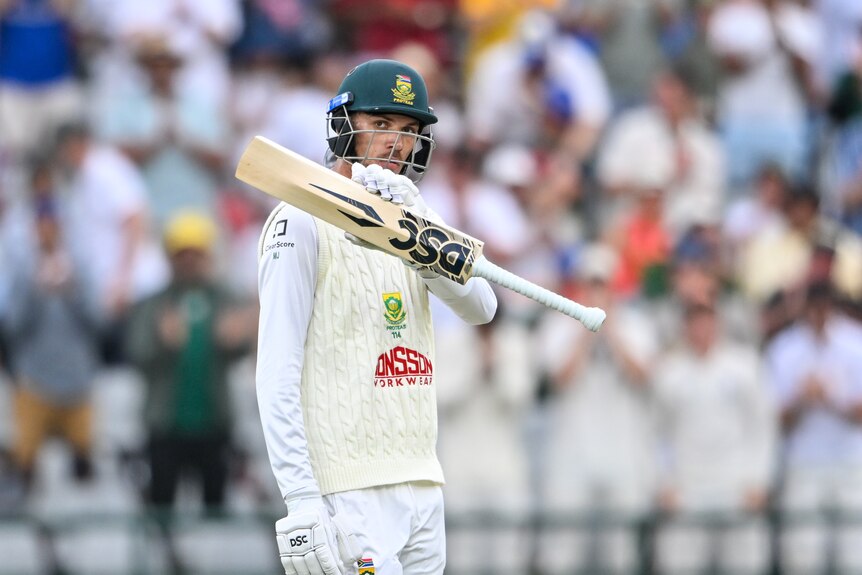
Marco Jansen again threatened to take the Test away from Australia before his innings was ended by a searing Starc yorker. (Getty Images: Ashley Vlotman)
That left South Africa 6-232 just after tea and reeling.
South Africa’s hero from Gqeberha, Marco Jansen, once again proved to be a thorn in Australia’s side, and notched the fourth half-century of the innings in a valuable 95-run stand with Ryan Rickelton (42).
Jansen and Rickelton saw South Africa safely to the second new ball, but then ran head first into a rampant Starc, who wiped out the final four wickets in the space of six lethal deliveries.
Follow the live blog below for a recap of all the day one action as it happened.
South Africa vs Australia Scorecard
STUMPS: South Africa all out 329
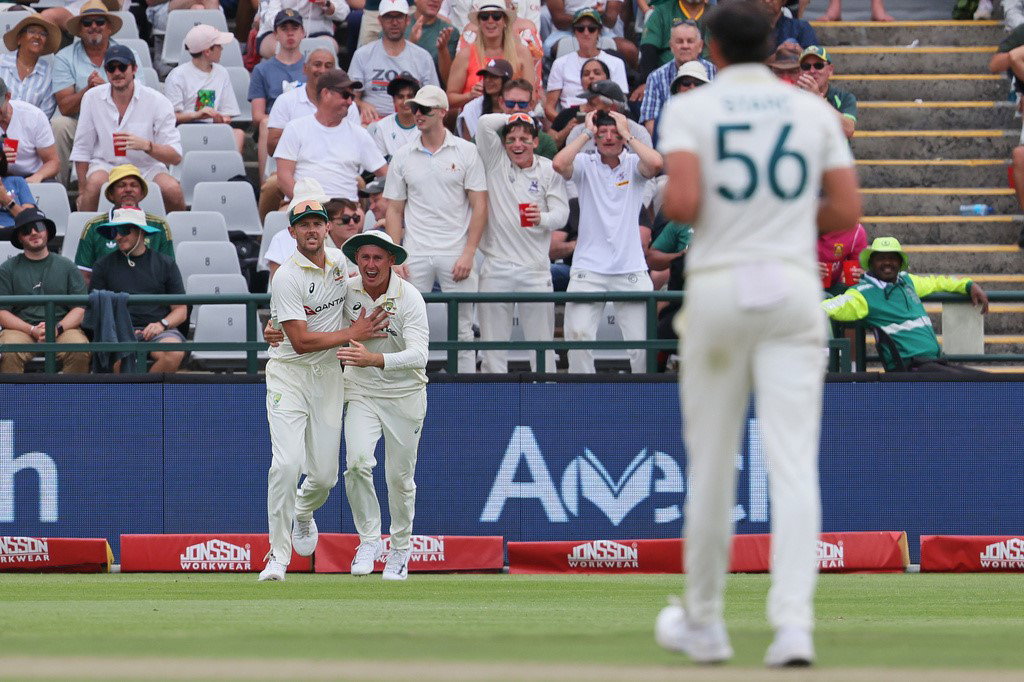
And that’s it for the day!
That’s a bit of a shame for the hosts… I am sure South Africa would have relished having a go at the Australian openers with a new ball tonight, under lights and with the cloud cover the way it is.
It’s where the slow over rate that plagues Test cricket has a material impact on matches too – and why those of us who care will continue to bang on about it.
But all up, we had a great day’s play so can’t be too disappointed.
And so, we shall leave it there.
A fascinating first day of action. There’s a lot of stories left to be told in this Test match.
Can Australia bat well enough tomorrow to make their recovery today worth the effort?
I guess we’ll find out, won’t we?
From me Simon Smale and Chris de Silva as well, we shall bid those of you still with us a very good night.
South Africa all out for 329
Will South Africa be happy with that?
I don’t know, in truth.
South Africa were put into bat.
But they then reached 0-158.
They recovered from a post-lunch wobble to be 6-327.
Are they below par? I think so.
Never judge a pitch until both teams have batted on it, of course.
But it’s going to be so interesting to see how Australia bats on this – and South Africa bowls.
LBW! STARC HAS THREE IN FOUR BALLS!
Kagiso Rabada has reviewed this.
But although that’s missing off and missing middle, it’s hitting leg stump half way up.
Mitch Starc finishes with 6-72.
Rabada is out for a duck.
83rd over – Starc has five to come
BEATEN! No hat-trick but a belter of a ball for Rabada first up, fizzing past his outside edge.
Starc is on a hattrick
He has three slips and a gully.
Kagiso Rabada on strike.
BOWLED HIM! STARC IS INEVITABLE!
Five-fa for Mitchell Starc!
It’s his 20th in Test cricket.
And he’s done it in the way that he has made his trademark, with devastating pace and accuracy with a brand new ball on his hand.
That one swung late again.
Coetzee had no chance.
Another fuller ball, Gerald Coetzee is out for a golden duck!
FOW 9-329
83rd over – Starc carries on
82nd over – Cummins comes into the attack
The lights are on. The clouds are overhead.
And the new cherry is swinging around corners.
Pat Cummins bowls outside off and Simon Harmer leaves well alone.
Outside off again – that’s not the area, Pat.
Finally Cummins pitches up and the ball swings away down the leg side.
WIDE! Goodness Patrick, that’s a trash delivery to waste on a new ball. He intimates that the ball swung – and it did. But if you’re starting it three feet outside off and angling the ball away, it’s only going to get worse.
Cummins again bowls the fifth stump line.
Better, Harmer defends.
And then Cummins bowls another wide delivery outside off to end the over. Not quite on song there from the skipper.
BOWLED HIM! MITCH STARC HAS ANOTHER!
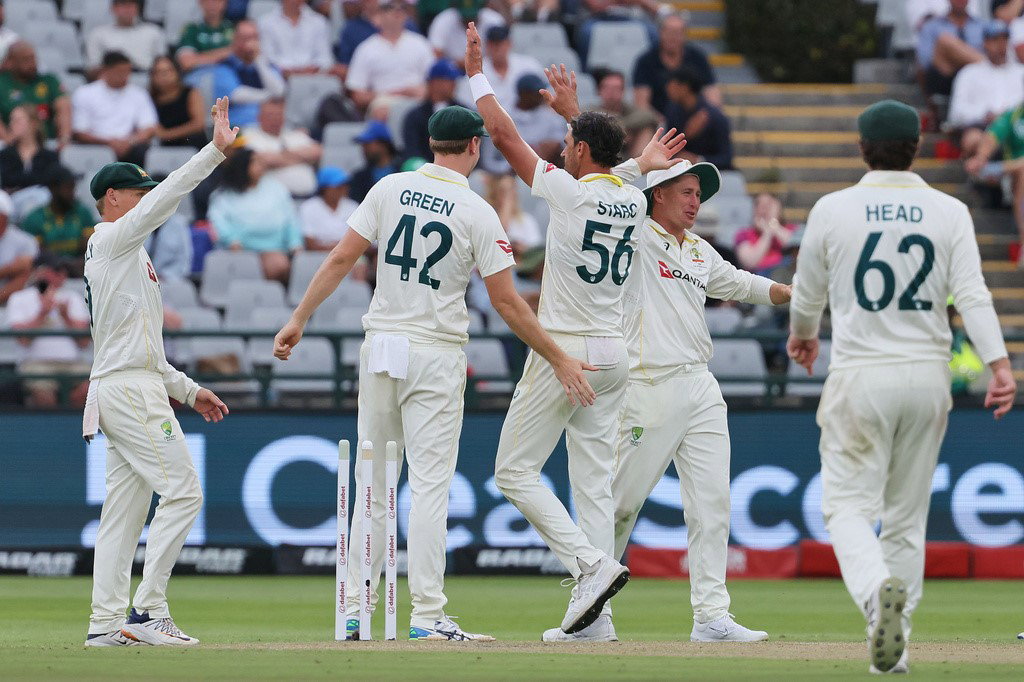
Another swinging delivery!
That one has swung really late too, Jansen looked to drive outside off but as he played the shot the ball swung back and cannoned into his off peg.
Great ball, top quality bowling from Mitch Starc.
Jansen goes for 52 off 71. FOW 8-328
81st over – Starc has a couple more
Interesting – the lights look like they’re having a pretty big impact out there based on the long range shot we just had of the ground.
Australia allowed to bowl pace.
Short from Starc – that’s not the play with a swinging new ball, Mitchell – and Simon Harmer, gets hit on the thigh pad and runs a leg bye.
LBW! STARC STRIKES!
He only needs to get it right once for him to strike – and Mitch Starc got it very right there.
Full, swinging away from leg to off, Rickelton thought it was going down leg, the swing deceived him and he paid the ultimate price.
It was stone dead, no use reviewing and I suppose Marco Jansen told him as much as Rickelton walks off, disappointed.
He goes for 42 off 83, a huge innings in the context of the match.
81st over – Mitch Starc with the new ball
The second new ball has been taken.
Wide from Starc with that hard new cherry, Rickelton cutting untidily away for a single to cover.
Three slips and a gully in place, Australia wants wickets and wants them now. Mid on and mid off are there too.
Jansen punches the ball uppish outside off for a single to cover. Way too short from Starc, not getting any swing on the ball bowling it there.
BEATEN! Wide, really wide, and Rickelton couldn’t resist, having a wild swing at the ball. It nipped a long way outside off from the pitch, so this ball could do something if Starc gets it right.
80th over – Nathan Lyon
Nathan Lyon bowls to Rickelton, who defends the first couple.
A misfield at square leg allows Rickelton a single to midwicket.
Jansen defends solidly. A new challenge awaits in a couple of balls time – no need to do anything silly now against this sizable challenge of a different sort.
He sees out the order.
79th over – Connolly to bowl another
A catching silly mid on, so Rickelton pushes to long off for a single.
Jansen defends the first, no slips in place for him, containment rather than catches the order of the day.
He pushes a single to long on.
Rickelton fends away to backward point for a single.
Jansen clips off his pads, Mitch Starc gives chase, the sort of run he wouldn’t have wanted to make a couple of overs before he takes the new ball. He gets plenty of advice from the crowd too. A couple of runs.
FOUR! Great shot from Jansen! Too short, he picked up the length perfectly and swung the ball away to cow corner, just a clean strike of the ball.
Fifty for Marco Jansen, 51 off 66 balls
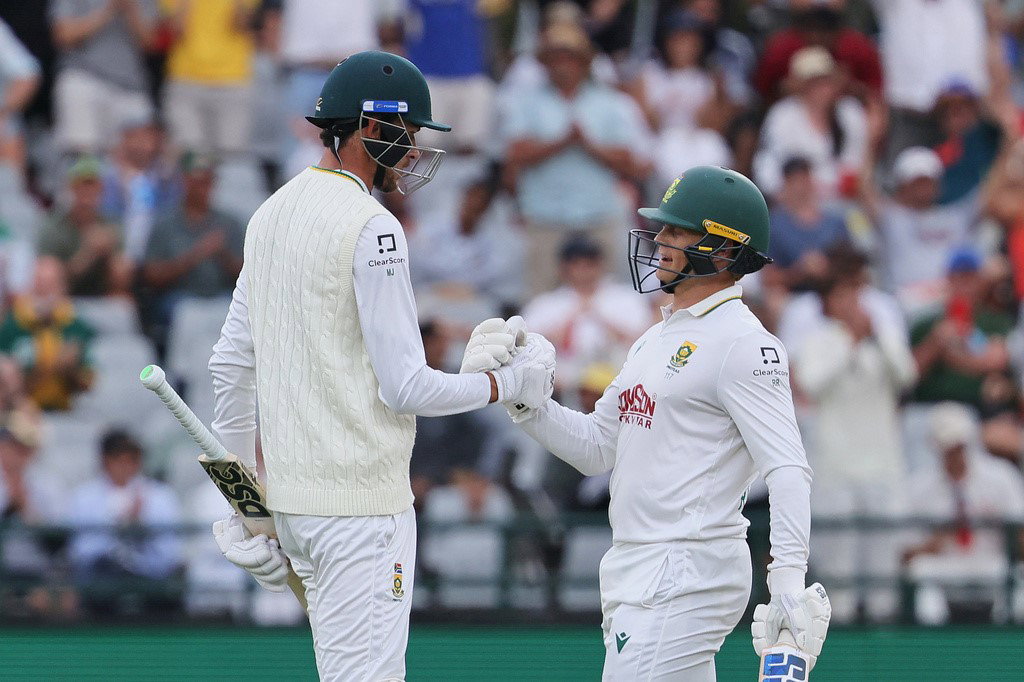
He is massive for South Africa. The leading all rounder in the world at the moment.
78th over – Nathan Lyon
BEATEN! That’s a great ball! Slower, across the face of Jansen, from around the wicket, Jansen perhaps thought it would turn, but it carried on with the arm and beat the outside edge. Great bowling.
Jansen takes off for a single as he pushes into the covers, Nathan Lyon himself racing after it. He’s going to be able to rest for a bit in a short while.
Leg slip and bat pad in place for Rickelton, Lyon coming over the wicket, with Rickelton playing the ball between them for a single.
Jansen defends the last couple.
77th over – Cooper Connolly continues
And Jansen fends to long off for the easiest of singles.
Rickelton uses the spin to turn the ball away on the leg side, but there is no run.
One slip in place, Rickelton fends the ball to long on for another very easy single.
Jansen uses his feet and doesn’t make great contact with the ball, hitting the inside half of the bat, and running back down the ground for a single when he was aiming for long off.
Rickelton takes a single to long on.
Connolly and his skipper have a chat and make a change, taking out slip for an option on the off side in the covers.
Jansen steps back and clips the ball away for a single to long on to end the over.
76th over – Lyon has another
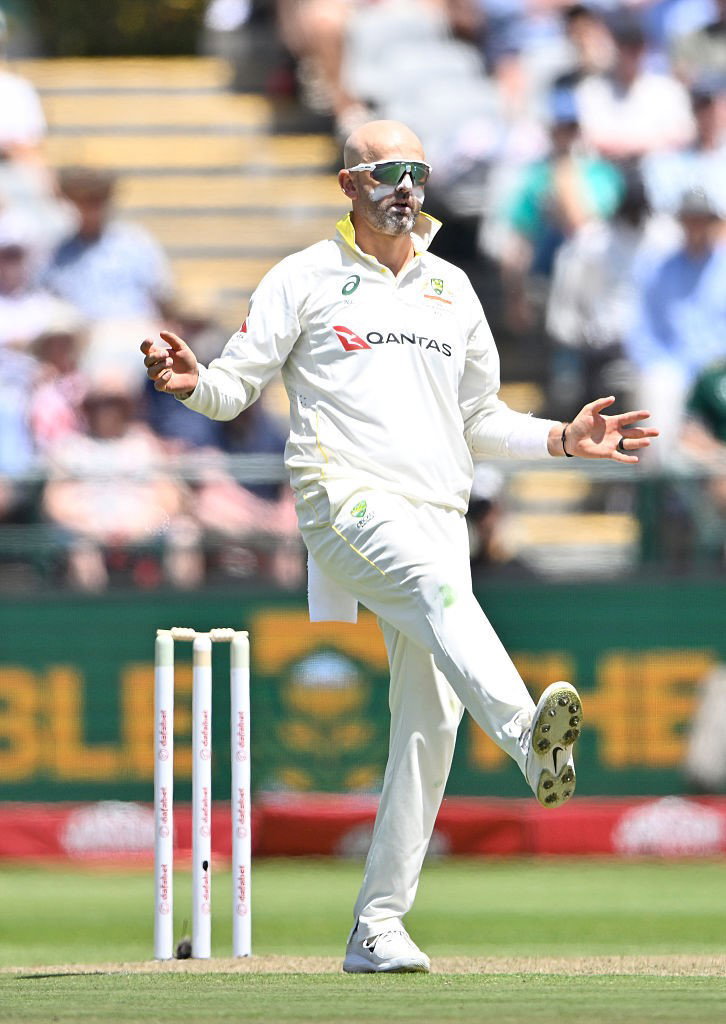
The new ball options are being studied on the boundary, as Rickelton defends the first and then pushes the second away for a single to long off.
Slip and bat pad for Jansen, who fends the ball to bat pad.
Slip moves across to leg slip now, joining bat pad on the leg side, Jansen responds by letting a leg-side pitching ball hit his pad.
Now he takes a single to point.
Looks like Andrew McDonald has selected the second new ball, with the assistance of Michael Neser.
75th over – Connolly continues
Leg side, Jansen clips nicely out to deep square leg for a couple.
CLOSE! Connolly gasps in synchronicity with Alex Carey as Jansen gets an inside edge onto his front pad. Close, that.
Jansen can’t quite get the ball away, defending a couple of straight ones before Connolly strays a touch leg side and the giant number eight clips away for a single.
Rickelton clips past Connolly for a single to long on to end the over.
74th over – Lyon comes back in
Oh that’s a good ball, Rickelton almost surprised by the movement through the air and then the turn off the pitch.
He defends the next one to bat pad.
The lights are well and truly on at Newlands, the tablecloth having slipped off the mountain to blanket the suburbs on its lower slopes.
Solid defence from Rickelton.
Lyon is varying his pace, Rickelton pushing a flatter one to cover point for now run.
And then he loops the last one that Rickelton defends to see out the maiden over.
73rd over – Connolly from the other end
Cooper Connolly has been switched around.
Rickelton leaves outside off – he’s been confident in doing so to Connolly, who is pitching the ball out on the off side.
Another stride to follow the ball as Rickelton leaves.
He loses patience now and drives on the bounce to the catching cover, Cameron Green, who theatrically throws the ball in the air, fooling none of the crowd.
Single for Rickelton now.
FOUR! Jansen wastes no time whatsoever, clipping the ball to long on with a languid slap of his bat.
He defends the last.
Five runs from the over – another quick one as Australia looks to maximise its overs with the second new ball in a handful of overs time.
72nd over – Renshaw gets a go
Matt Renshaw is given another of the junk overs before the new ball is due.
Rickelton has to dig the ball out first up.
FOUR! But then a rank full toss is dispatched down the ground for a boundary to long on.
Renshaw pitches this one better, and Rickelton clips it away for a single.
Jansen gets a stride in that dwarfs the crease, well defended.
That’s a nice ball, outside off, tempting Jansen, who leaves it well alone.
Good ball again to finish from Renshaw, who it’s safe to say built into that over.
71st over – Hazlewood continues
There is a ring field on the off side through the covers for Rickelton, a wideish slip and a gully. Rickelton plays the ball past the cover fielders for a single.
Jansen is back defending, his earnest features staring back down the pitch at Hazlewood.
Jansen defends in almost staccato fashion, the bat flicking down vertically as the ball arrives and then flicks back behind him. Good timing, I guess.
Another sharp defensive jab from Jansen, whose elegance when playing a drive is offset by the jagged awkwardness of his defence, as if his height is just too much for the art of batting.
Height doesn’t help there either, as Hazlewood digs in a bouncer and Jansen folds himself, Praying Mantis-like, under it.
A solid defensive shot ends the over.
70th over – Cooper Connelly replaces Nathan Lyon
Left arm spin replaces GOATed off spin.
Is Jansen going to get carried away with the opportunities that Connolly provides?
Not yet, a single with a deft cut out to backward point.
Outside off, Rickelton lets it bounce past his pads to Carey.
FOUR! Yuck! Connolly bowls outside off, Rickelton steps across to cover his stumps, but the ball just doesn’t bounce at all! It’s a pea roller that beats Carey and goes through for four byes. That’s alarming though, for there to be that much variable bounce on day one!
Jansen back on strike after Rickelton steals a single, the fielders square moving back in anticipation of a big hit or two.
But it doesn’t come, well defended by Jansen.
69th over – Hazlewood steams in
And the giant Jansen defends outside off, the bat like a matchstick in his hand.
FOUR! Goodness me! That is a staggeringly good shot from Marco Jansen. It’s a short, wide delivery, Jansen summed up the line and length quickly and cuts the ball away to the boundary like an Exocet missile. Crunch!
Two solid defensive strokes from Jansen, proving he can mix patience with the unquestionable power.
FOUR! Another exceptional shot square of the wicket – this time he backs away and drives on top of the bounce and sends the ball flying to the rope.
He takes a quick single to end an exceptional over in which he once again proved just what a good cricketer he is.
That brings up the 50 partnership as well, 52 from 73 balls.
68th over – Nathan Lyon continues
This next hour could be exceedingly interesting – and of huge importance for the result of the match.
Lovely loop as Rickelton defends off the inside part of the bat.
There’s a slip, the ever-yapping Labaschagne, and a bat pad in place.
After a couple of defensive stokes, Lyon can’t stop a push to mid off from beating him and Rickelton runs a single.
Jansen is on strike and Lyon tempts him outside leg, and he leaves it.
And then he pushes delicately down the ground for a single to end the over.
Nothing like a quick drink to unsettle the most stable of partnerships
Rickelton and Jansen look to be well settled – have we mised an opportunity to keep the pressure on?
– Mike
And as any partnership knows, nothing good ever happens when drinking after midnight.
66th over – Hazlewood replaces Cummins in the attack
Josh Hazlewood returns to the bowling crease, replacing Pat Cummins, who remains wicketless.
Will Hazlewood continue the short-pitched tactic?
FOUR! A bit of a loosener, not too full, not too short, and Rickelton climbs into a beautiful back-footed punch through the off side.
Rickelton slowly starting to look a little more fluent now, having worked so hard to get in.
Hazlewood hits a better length that time and Rickelton defends into the off side.
Hazlewood gets a bit fuller outside off and Rickelton shoulders arms. He’s got two slips in waiting for that nick.
Another one outside off but Rickelton shows good discipline by leaving it alone.
Hazlewood drags his length back a little and Rickelton punches him into the off side off the back foot, but can’t beat the infield.
Hazlewood bowls a slower delivery full outside off and Rickelton drives it into the deep for a single and that’ll be drinks and Simon Smale will bring you home!
65th over – Rickelton gets a much-needed boundary against Lyon
Lyon continues to Rickelton. Fires one in towards middle stump and Rickelton plays it away on the leg side.
Lyon continues to aim at that middle and leg line and Rickelton plays this one down the pitch back to the bowler.
He’s such a master to left-handers.
This time Lyon pitches it a little too short and Rickelton is able to work it away for a single on the leg side to get off strike.
Drops it short again and Jansen cuts it away for a single into the off side.
FOUR! Too full that time from Lyon and Rickelton whips it away to the boundary, that’ll ease some of the pressure that’s been building!
Another good shot, this time it’s a punch down the ground for a single to end the over.
64th over – Jansen continues attack to short stuff
Cummins around the wicket to Jansen, proper bodyline stuff incoming.
He starts with a short one which goes down the leg side and Jansen is able to easily evade that one.
FOUR! Jansen climbs into a pull shot this time and clubs it away to the midwicket boundary, terrific shot.
BEATEN! Cummins goes shorter but this one stays lower and flies juuust over middle stump! A little bit of uneven bounce coming through now.
Cummins with another bouncer, but this one again flies down leg side.
Cummins with the two-card trick as he goes for a yorker, but Jansen is equal to the task and knocks it down the ground for two.
Another short one to end the over and Jansen ducks under this comfortably.
63rd over – Lyon continues to trouble Rickelton
This partnership has slowly built to 23, South Africa will want plenty more here.
Lyon gives the first delivery plenty of air but Jansen shows him respect and defends.
The next one pitches and spins in and beats Jansen. Carey tries to dive to collect it, but it falls safely.
A shorter delivery from Lyon, poor delivery, and Jansen is able to get off strike with a single down to long on.
He comes around the wicket to Rickelton, who drives the first one down the pitch.
He’ll have to watch for the straighter one which slides on with the arm.
BIG LBW SHOUT! There it is! Rickelton shoulders arms and there’s a massive appeal, but it’s given not out again.
There’s a short conference but Australia decides against sending this upstairs. A good decision in the end as ball tracking shows that would’ve missed off stump.
Lyon fires one in at leg stump to end the over, but Rickelton is able to flick it away.
62nd over – Cummins replaces Starc with a change of ends
A change of ends for the Aussie skipper as he replaces Starc after his double breakthrough.
Cummins bangs one in but it’s down leg side and Jansen awkwardly wriggles out of the path of the delivery.
Cummins digs it in again and Jansen gets over the top of this one and guides it down to third man for a single as the lights come on, I wonder whether the light meters will come out soon.
A rare full delivery from Cummins as he stays over the wicket to Rickelton, who leaves it alone outside off stump.
Another one outside off and Rickelton again shoulders arms. He’s looking to induce the edge there, but Rickelton is very watchful right now.
BEATEN! Another loose shot against a short delivery as Cummins digs one into the pitch. That’s a really poor shot and he’s lucky to get away with it.
FOUR! Much more like it! Cummins pitches up and Rickelton times this drive superbly and the ball screams past Starc at mid-off.
61st over – Rickelton survives a huge LBW shout and review
Nathan Lyon back into the attack. He’ll be up against Marco Jansen first.
Floats one up and Jansen awkwardly defends the first delivery.
Another one straight and Jansen defends. I think he looks awkward mostly because he’s so tall.
Lyon drops the third one a little shorter and Jansen picks up a single on the leg side.
Lyon comes around the wicket to the left-handed Rickelton.
FOUR! Well played! Lyon got a little too straight and Rickelton flicks him past short fine leg for a boundary to bring up the 250 for South Africa.
A good ball aimed at middle and off and Rickelton defends into the leg side.
BIG LBW APPEAL! Lyon gets one to slide on with the arm and Rickelton plays and misses, but it’s given not out! After a short deliberation, Cummins sends it upstairs.
The ball is extremely close to Rickelton’s bat, has he hit it? UltraEdge says yes, and Rickelton survives!
It would’ve been interesting to see whether that was going on to hit the stumps had Rickelton not hit it. Close call nonetheless!
60th over – Starc draws blood from Rickelton with brute
Starc vs Jansen continues here. A fascinating battle between two giants.
FOUR! SHOT! Starc goes short but it’s again on the off-stump line and Jansen laces it through point off the back foot. What timing that is.
Starc goes a tad fuller and Jansen defends it into the off side and picks up a quick single. Good running. They need more of that. We saw plenty of good running in the first session between Markram and Ackerman.
OUCH! Starc goes short again and this time wraps Rickelton on the glove and it squirts away into the off side and they pick up a single. That’s hurt Rickelton, he’s got the glove off and is shaking his left hand, looks like it might’ve caught him on the tip of his thumb.
Upon replay it’s actually struck Rickelton’s index finger and it’s actually split it open and there’s some running repairs happening.
Starc digs another one into Jansen, who ducks under it comfortably.
A well-directed short one is awkwardly fended away into the leg side by Jansen for a single.
Another good short one to end the over and Rickelton fends it away for a dot.
59th over – Jansen has liftoff against Cummins
Cummins gets his first look at Jansen here. How long will Marco remain patient?
FOUR! Jansen opens his boundary account with a quite beautiful uppercut! Cummins went short, but that was the wrong line, too far outside off.
Cummins goes short again, but this one swings down the leg side and Carey’s dive results in a bye.
A good short one this time aimed at Rickelton’s ribs and Rickelton once again fends it off nicely.
Graeme Smith’s doppleganger of a son is back on the TV screen and loving it.
Cummins goes a tad fuller that time and Rickelton defends it a little more comfortably.
It’s another short one from Cummins, but this one dies on Carey as he takes it as Rickelton ducks under it again. He’s willing to be patient, for now.
Cummins comes around the wicket and digs another one in and Rickelton defends once again.
58th over – Starc continues with short-pitched ploy
It’s almost exclusively short stuff right now from the Aussies, they’ve found a method to undo the Proteas.
Starc thuds one in and Jansen drops his wrists under it and leaves it alone.
Another short one, well directed, and Jansen ducks under it.
EDGED! Another short one, this time it’s outside off, and it draws the edge to Jansen and it flies past slip. A terrific dive from Nathan Lyon on the boundary keeps it to just one.
Starc hammers one in back of a length again and Rickelton fends it away into the leg side. He’s four off 16 deliveries and the run rate is now 2.12 for the session.
Another short delivery from Starc, Rickelton is able to duck under this one. When is the yorker coming would be what I was thinking if I was Rickelton.
Starc does go full, but it’s not really yorker length. Rickleton tickles it fine, but Carey makes a diving stop behind the stump.
57th over – Cummins brings himself into the attack
Pat Cummins sniffing blood here. He’s bringing himself on.
Australia will back themselves to bowl South Africa out tonight itself now.
Cummins, around the wicket, starts with a short delivery to Rickelton, and he defends it into the pitch.
He digs the next one in again, but this is down the leg side and Rickelton leaves it alone.
Another short delivery from Cummins, rising towards Rickelton’s ribs, and he’s defending again.
Australia has 2-11 in 4.3 overs so far this session, things have completely dried up for South Africa.
Cummins again doesn’t quite get his aim right with a short delivery, sending this down leg.
Cummins comes back over the wicket and again sends another one down leg. His radar has been a little off today.
Another short one to end the over, but this flies well over Rickelton’s head.
56th over cont. – Marco Jansen arrives in the middle
Marco Jansen, after his heroic 85 in the last Test, is suddenly out in the middle.
South Africa has lost 5-29 after being 1-203 at one point in time.
Starc digs another one in short and Jansen hops back and defends it into the pitch. They need more of that, and less of the wild hooking and pulling.
Another one to end the over and this time Marco ducks under it, which tells you just how high that got.
No.56 ends up picking up two wickets in over 56. There you go.
WICKET! Mulder goes for a duck! Another one!
Oh my goodness, Starc has taken out another one!
It’s another short delivery and Wiaan Mulder tries to take it on again and gloves it through to Alex Carey and he’s gone for a duck.
Unbelievable stuff, they’ve completely collapsed here in Cape Town.
Wiaan Mulder c Carey b Starc 0 (2), FOW: 6-232
56th over cont. – Mulder arrives at the crease
Australia has two new batters at the crease here as Wiaan Mulder joins Ryan Rickelton in the middle.
A good length delivery from Starc to start with and Mulder defends well down the pitch.
Some really poor batting has let Australia climb right back into this Test out of nowhere.
WICKET! Bedingham holes out in the deep!
Another South African has given it away!
David Bedingham, after being softened up by a short one, decides to take one on from Starc and top edges it.
It looks like it’s going to fly over Josh Hazlewood’s head for six, but he takes a terrific catch while balancing himself in close proximity to the rope.
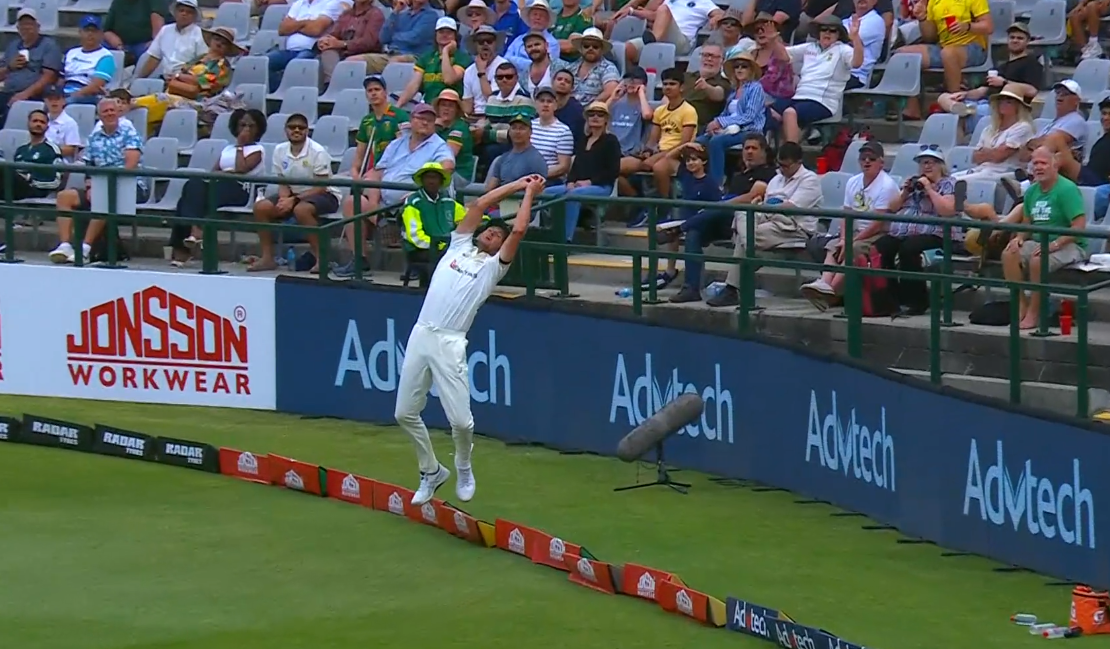
Australia continues to make further inroads into this South African batting line-up. Game on folks!
David Bedingham c Hazlewood b Starc 50 (80), FOW: 5-232
56th over – Starc to continue
Can No.56 pry out a wicket in the 56th over? Starc continuing here, he’s got 0-62 off 12 overs so far.
OUCH! Starc with another short one that Bedingham tries to pull but the ball cannons into his guts instead and that’s winded him a little.
55th over – Rickleton brings up half-century after scare
Cooper Connolly to continue, he’s been pretty tidy so far.
Starts with a full one which Rickelton drives nicely to mid-off for a single.
Connolly goes shorter and Bedingham drives him on the back foot, and a wonderful diving stop at mid-off denies a run.
BEATEN! Wooooahhhh! Connolly gets one to grip and turn and my goodness that’s almost clean bowled Bedingham. Marnus with another appeal simply based on vibes.
Bedingham drives the next one into the off side but it’s another dot.
Connolly drops the next one short and Bedingham cuts it away, he’s denied a boundary but still brings up his half-century off 78 deliveries.
Connolly floats the next one wide outside Rickelton’s off stump and he shoulders arms to end the over.
54th over – Starc back into the attack after break
Mitchell Starc back into the attack for the first time in a long time.
Can he get some reverse swing with this older ball?
He starts over the wicket to Bedingham, who defends a back of a length delivery on the back foot.
Another short one from Starc, this time it’s outside off, and Bedingham punches it into the covers for a dot.
An identical delivery and Bedingham defends again. Starc trying to build a little bit of pressure to force a false stroke.
Another short one this time induces a pull shot out of Bedingham, but he’s well in control and picks up a single to the man out in the deep.
Starc goes for the inswinging yorker but doesn’t quite get it right and the ball slides down the leg side. Right idea though, that did tail a little bit, which will encourage him.
Back of a length to end the over and Rickelton works it nicely off the back foot for a single into the deep on the off side.
53rd over – Connolly to continue after tea break
David Bedingham and Ryan Rickelton stride out to the middle with a job to do.
South Africa won’t want to lose too many more wickets before the second new ball, which is due in another 27 overs.
Connolly to continue after his maiden breakthrough.
Bedingham plays back to the first delivery, which did keep a little low, dangerous stuff.
Connolly floats the next one a little wider and Bedingham cuts it away, but can’t beat the infield.
A good delivery outside off and Bedingham leans forward and defends it into the off side.
FOUR! Connolly fires this one in towards leg stump and Bedingham sweeps it away behind square leg to the boundary.
Connolly floats the next one up and Bedingham chops it to mid off for a dot.
Another one on leg stump and Bedingham flicks it away on the leg side for a single. A diving stop from Nathan Lyon saves a second boundary.
The final session is set to get underway
Suddenly this Test match is finely poised once again after a terrific fightback from Australia and some poor batting from South Africa.
Both Markram and Ackerman gave their wickets away, and when you’ve got a side like Australia on the mat, you don’t want to open the door even just a little.
That opening allowed the Aussies back into it, and now they’ve pegged it back towards being a level contest.
I’d still have South Africa ahead by a hair, but this final session looms as a pivotal one.
Given the start, if Australia can hold South Africa below 350 in this first innings, that would be a massive result for the tourists.
TEA: South Africa 4-221 (Rickelton 2, Bedingham 41)
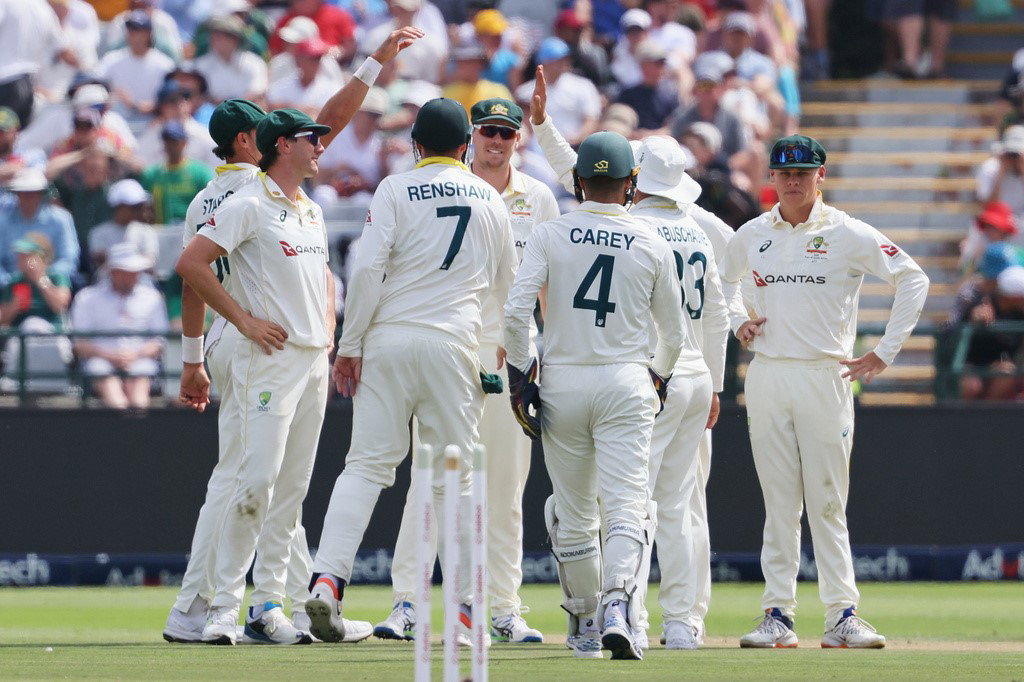
So, a great session for Australia.
Four wickets fell for just 81 runs in the session, South Africa throwing away a dominant position to be in just a bit of a hole.
Bavuma and Breetzke both failed to deal with straight ones, while Markram and Ackerman struggled with their patience and spectacularly threw away a 158-run opening partnership.
Nathan Lyon has delivered a wonderful middle finger to those who suggested he was a spent force with two wickets, while Cooper Connolly has added another wicket to the spinners ranks with his first in Test cricket.
South Africa had looked like they were going to run away with things for a while there.
Now it seems far more evenly poised, just how we like it.
52nd over – Cummins continues
Bedingham defends into the off side, mid off fielding the ball.
Bedingham pulls to deep backward square for a single that takes him, stealth-like, to 40. Seems to have got there quite quickly as the wickets tumbled at the other end, but it’s taken him 62 balls.
Rickelton digs out a very good yorker from Cummins.
Now he fends to point for a single.
Bedingham defends.
Bedingham clips away for a single to end the over, and the session.
51st over – Connolly has a few more to come
Another boorish roar from Marnus behind the stumps as the new batter, Ryan Rickelton defends the first.
He takes a single to mid off next ball.
Bedingham defends and, once again, Marnus pollutes the air worse than an out of control teenager’s party for absolutely no reason.
A great over for Connolly.
LBW! COOPER CONNOLLY HAS HIS FIRST TEST WICKET!
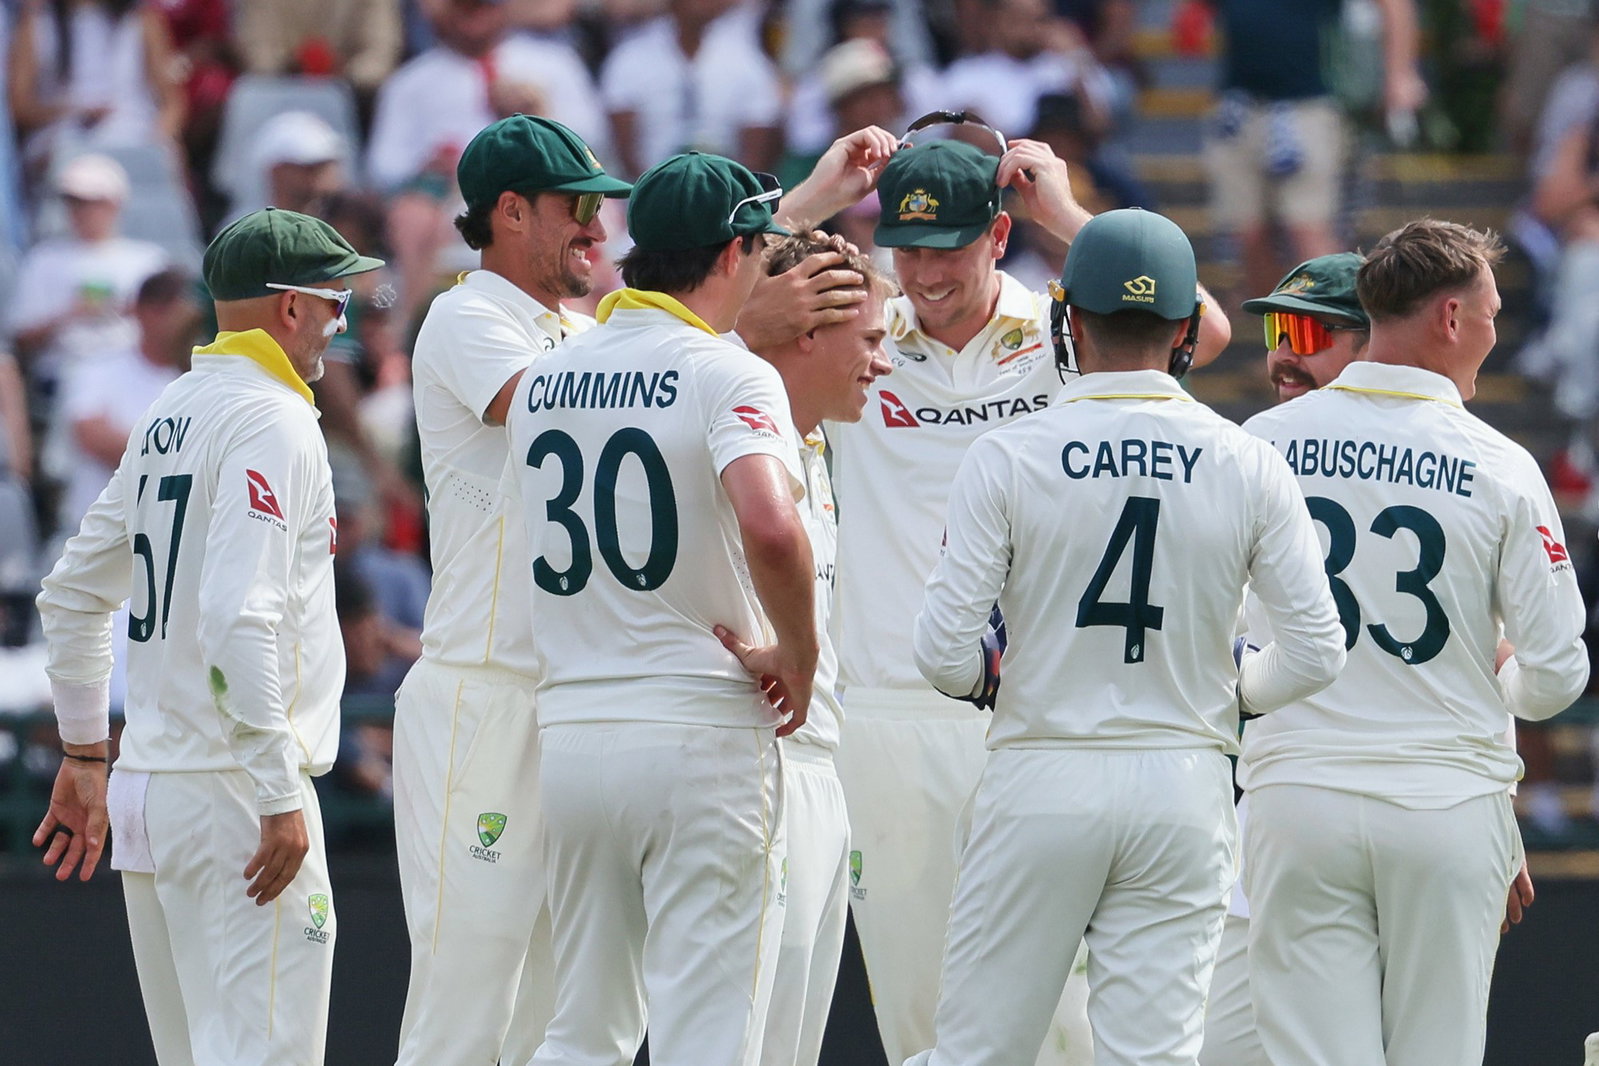
A brilliant review!
The ball brushed the pad of Matthew Breetzke just before it hit his bat.
And it would have gone on to hit off stump.
A HUGE moment in this Test match.
South Africa are falling apart somewhat, 1-203 to 4-216 in the space of a handful of overs.
Breetzke is out for a 12-ball 2.
Matthew Breetzke lbw b Connolly 2 (12), FOW: 4-216
51st over – Connolly continues
BIG APPEAL! HUGE APPEAL! Marnus is, predictably roaring and celebrappealing. Alex Carey is keen too – AND THEY’VE CONVINCED PAT CUMMINS TO HAVE A LOOK.
Now, did that hit the pad before the bat? They were very close together…
BUT IT’S HIT PAD FIRST! THIS COULD BE CLOSE!
50th over – Cummins continues
Bedingham drives and is a bit early, the ball striking the inside edge and going back down to the Australian skipper instead of careering through the covers.
Bedingham drives once more, this time the ball is fielded at cover.
Mid off doing the fielding this time as Bedingham just attempts to reacquaint the ball with the middle of his bat.
Shorter from Cummins, Bedingham pulls hard, doing well to get on top of the ball, but he won’t get a run as Marnus fields well at mid wicket.
Bedingham drives again, but again the timing isn’t quite there.
FOUR! There it is! Bedingham has looked for the cover drive all over and, after a handful of sighters, finally middles one, sending the ball flying to the rope at breakneck speed.
49th over – Cooper Connolly comes into the attack
Bit of off spin from the new lad.
Marnus screams like he’s just sat on a huntsman as Bedingham clips off his pads.
Bedingham defends the next just as ably, and gets more vocal encouragement from Marnus.
Wide, and Bedingham cuts down to deep backward point for a couple. There’s some excitement on the boundary as Matt Renshaw runs around to field on the rope. He seems to be playing up to the crowd up there – must be nice to play in front of a crowd this series for the first time…
Breetzke cuts and gets a single.
More excitement for the crowd down there at backward point as Bedingham takes a single towards Renshaw.
And another single ends the over at mid off, Cummins misfielding slightly.
48th over – Pat Cummins comes into the attack
Cummins has gone at almost five runs per over in his 10 overs so far today, 0-49.
He brings himself back on to see if he can extract another Proteas batter.
Bedingham defends solidly to the first couple, Cummins right on the money straight away with two deliveries.
Slip and a gully in place, but too straight from Cummins and Bedingham clips away for a single to deep square leg.
Bouncer from Cummins, Breetzke ducks under it, Australia still thinking its worth bruising the new man up a little.
Breetzke defends a pitched up delivery, and then does the same to one dropped a tad short to end the over, just a single from it.
47th over – Nathan Lyon continues
Can Lyon continue to take wickets?
Whether he can or can’t or how close he gets or not, Marnus will no doubt continue to bellow his inanities from close in.
Bedingham is using his feet, and his bat, nicely.
Marnus moves to leg slip after a couple of solid defensive strokes from Bedingham.
South Africa slightly in risk of getting bogged down against off off spinner here.
But Bedingham breaks the maiden on the last ball, but punching it away to mid on for a single.
46th over – Hazlewood continues
Breetzke defends a ball off his off stump with a straight bat, playing the ball right under his eyes.
He leaves outside off, leading to another exaggerated and over-played yelp of excitement from Marnus Labuschagne.
Breetzke defends once again.
There hasn’t been a lot of variation in pace from the Australian quicks, but Hazlewood has just dropped his a little, prioritising accuracy over speed.
He digs in a bouncer to end the over and holds a maiden.
45th over – Nathan Lyon has Matthew Breetzke in his sights
After giving their best impression of a funeral procession, the Aussies are all achipper again out in the middle, led by cheer leader Marnus Labuschagne but there are a couple of other voices joining his now.
Breetzke gets a single straight away to get off the marl.
Then Bedingham sees out the rest of the over, to a soundtrack of wild groans from Marnus Labuschagne.
BOWLED HIM! NATHAN LYON STRIKES!
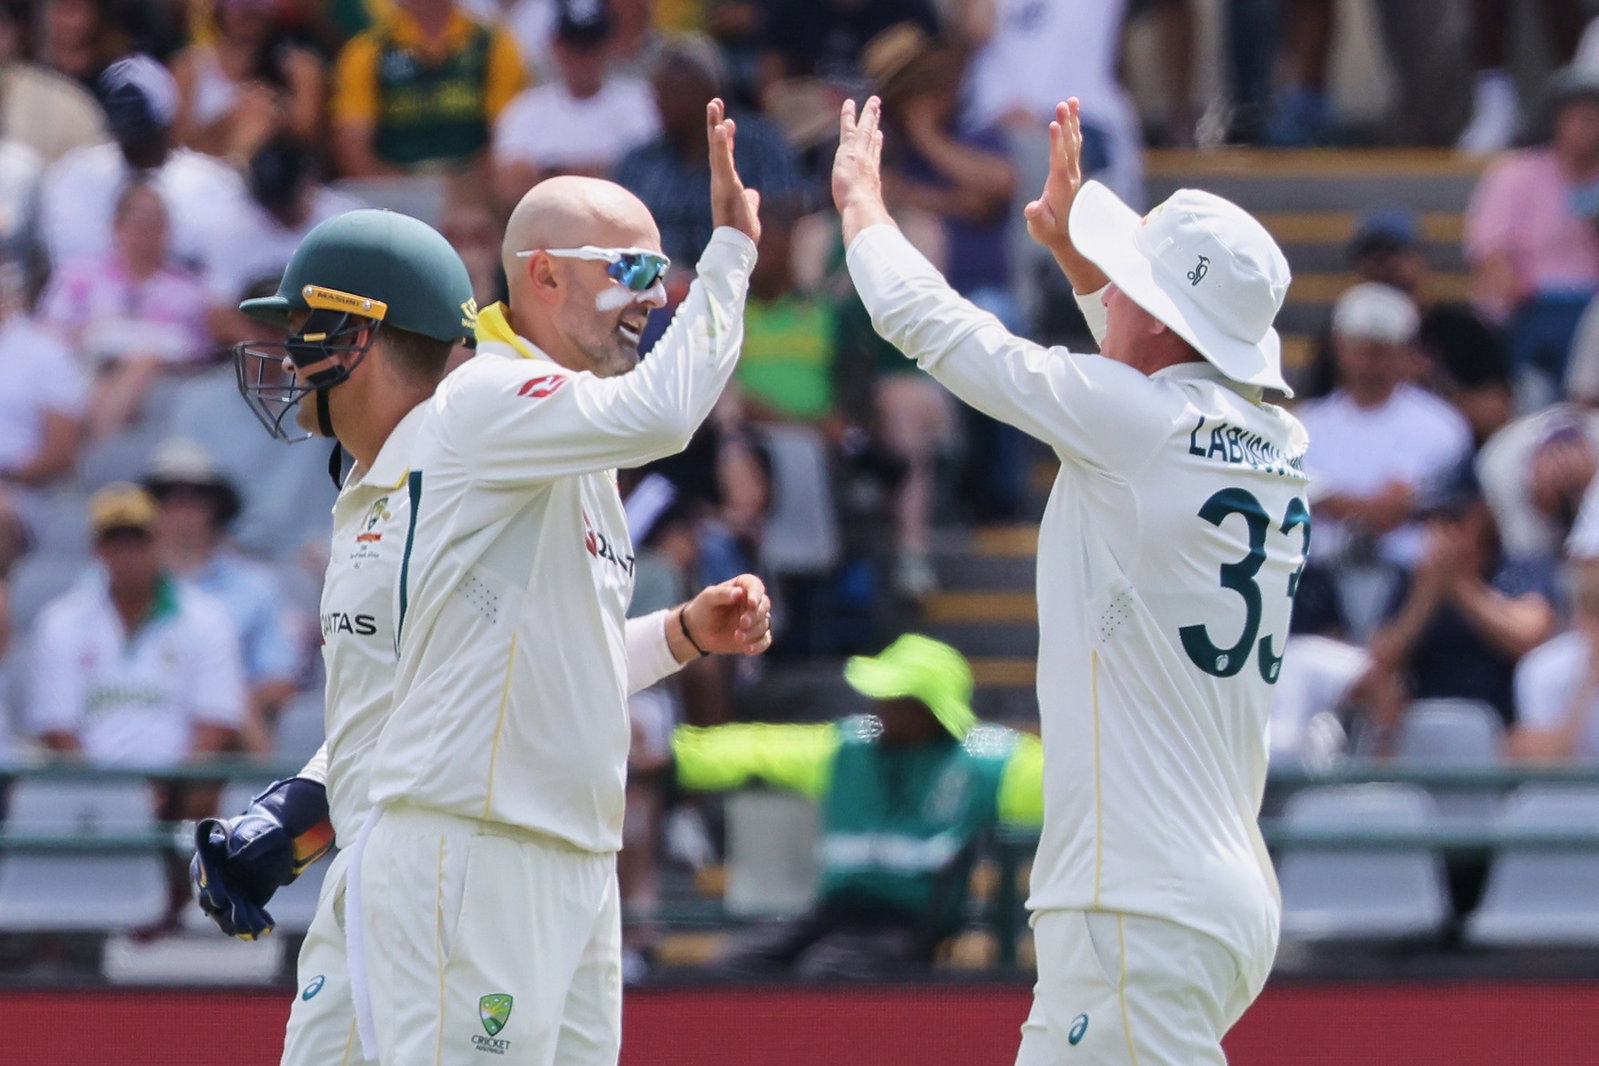
A mini-collapse for South Africa!
Temba Bavuma plays inside the line, looking for turn that never came and hears his off stump get castled.
It’s a mistake from Bavuma but good, accurate bowling from Lyon, that is rewarded in the best possible way.
Bavuma goes for a duck and South Africa are 3-204!
Temba Bavuma b Lyon 0 (3), FOW: 3-204
45th over – Nathan Lyon continues
Shouts to the fielders to stop the ball as Bedingham drives to long on, and takes a single.
Ric stat
Bit late to this one, but it’s a good stat.
Loading Twitter content
44th over – Hazlewood has two more
Temba Bavuma walks out to bat to a huge ovation from the Newlands crowd. They love their skipper in this part of the world and they are letting him know it.
There’s a small issue with the sightscreen, which needs a bit of attention. Two slips and a gully in place, Bavuma defends solidly to the opening two balls of his innings.
TAKEN! MARKRAM THROWS AWAY A TON!
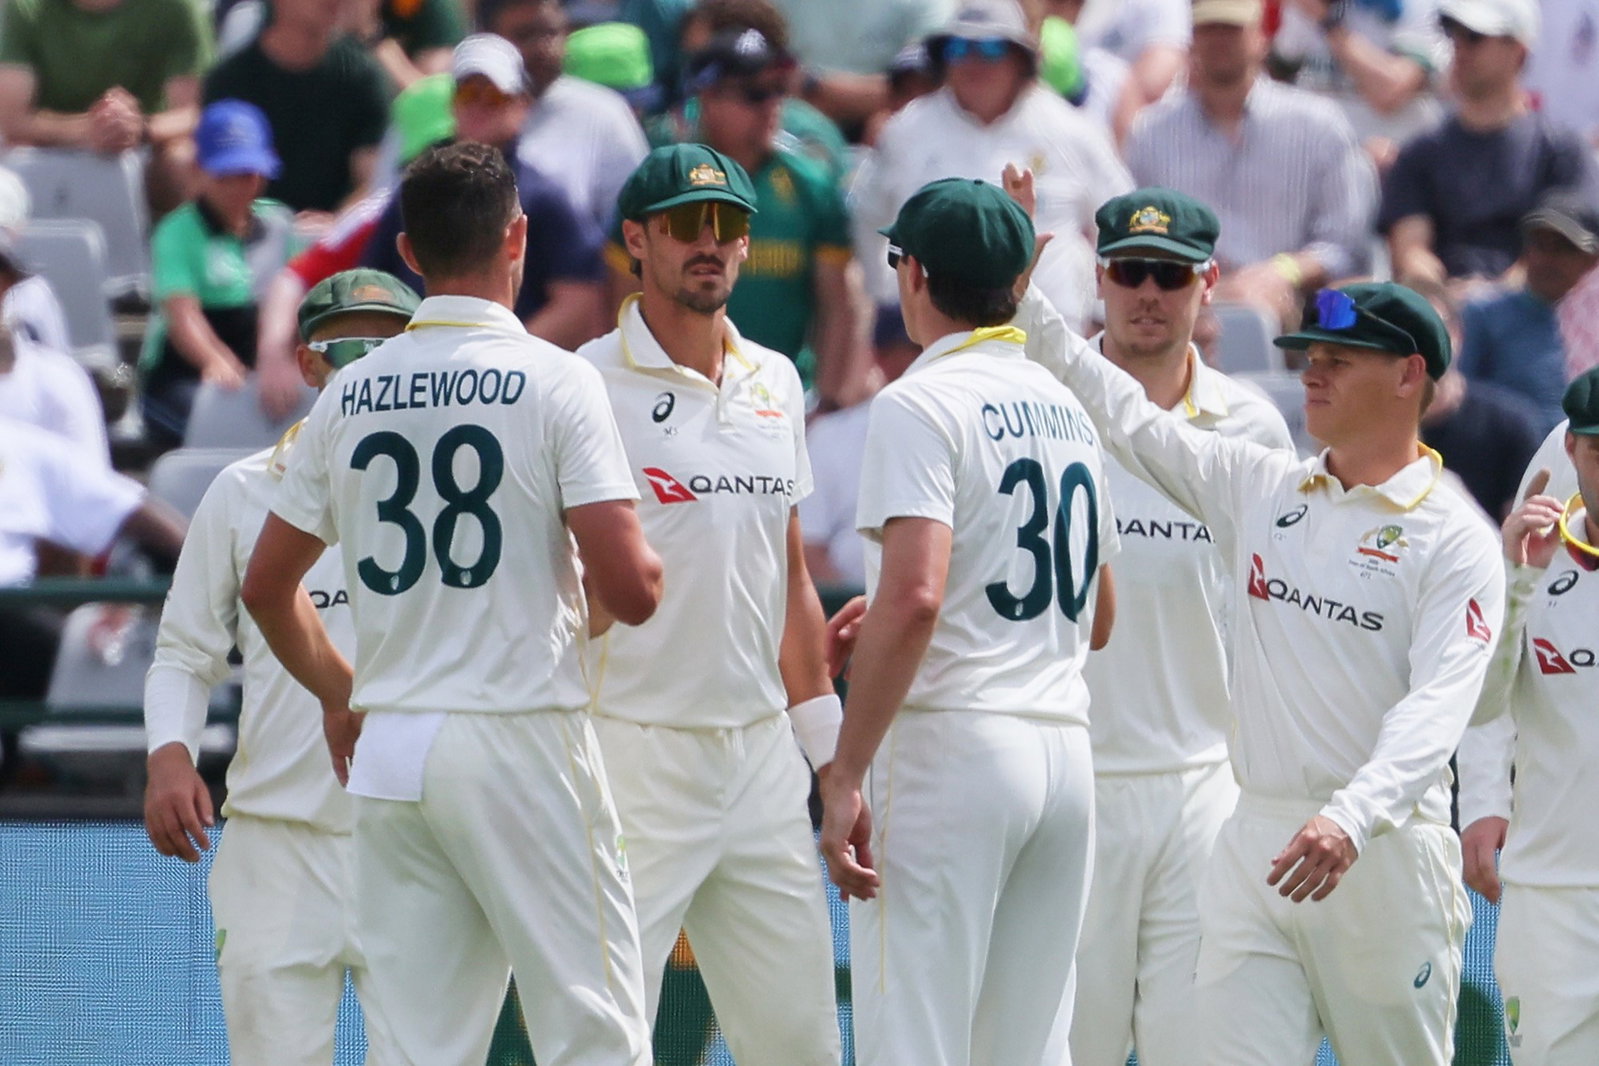
Both openers have thrown away their wickets!
We spoke about the struggles of playing with a horizontal bat on this pitch, and Markram has fallen playing a pull shot that he’s skied to deep backward square.
It’s a brilliant catch, that much needs to be said, Mitch Starc, who saw a drop off his bowling that had to be seen to be believed earlier in the day, shows them how it’s done, waiting out on the boundary, setting himself and then making a good catch diving forward right on the rope.
Markram, who looks disgusted with himself and rightly so, goes for 78 off 141, South Africa 2-203.
Aiden Markram c Starc b Hazlewood 78 (141), FOW: 2-203
44th over – Hazlewood continues
Markram defends the first couple.
43rd over – Lyon continues
As does Marnus’s idiotic caterwauling in the close catching position at slip.
Lyon is drifting the ball nicely, lopping it from leg to off, subtly changing his pace but always testing the batter.
Markram cuts a flatter, faster ball away for a single to backward point.
Bedingham clips off his pads, slip had been moved to leg slip and there was a bat pad in place but the ball bisected them. There is no run though, just a single from the over.
The camera at the ground keeps cutting to a pair of office workers – WHOSE OFFICE IS AT NEWLANDS! What a great place for an office. The windows looking out over the pitch… I think Australian cricket grounds need to explore this as an option…
Reminds me of the Oval in England offering work from the cricket spaces during County Championship games… (see below)
42nd over – Josh Hazlewood comes into the attack
Bedingham defends the first couple off his stumps, there is a close catcher in very straight at short mid on. One slip, and a gully.
FOUR! THAT’S WHY HE’S THERE! Bedingham drives on the up, Marnus, whose done more chatting than anything useful so far today (or even this series) has lunged across and missed taking the catch, Markram has dived out the way, and the ball flies to the long on boundary.
FOUR! “SHOT!” is the cry, perhaps from Markram, a drive of the highest quality through the covers. No point in chasing it – sit back and admire the beauty of it is all the fielders can do.
Cameron Green not bowling
If Green isn’t bowling, why pick him over Boland or Webster? As a full all-rounder, sure, but Aus could really use something extra here – Cam’s going to need to tonk a few later!!
– Matt
I just heard that too, Matt.
Interesting.
Genuinely, I don’t know. If he’s been selected as a batter, there might be a case for Boland to come in and play instead of Marnus.
But yes, strange one, that.
41st over – Lyon continues
Sharp take down the leg side by Carey as Lyon looks for a knick.
Bedingham defends.
Second time down the leg side, Lyon liking the look of Bedingham’s eagerness to chase those deliveries. Inexplicably, Marnus appeals loudly for a caught behind, despite him having no way whatsoever of seeing or hearing an edge from where he was at slip.
Bedingham clips off his pads for a single, the only run from the over.
40th over – Starc continues after a drink
Bedingham clips off his pads for a single, Starc again far too straight from over the wicket.
Bit of venom there from Starc, a short pitched ball rearing at Markram, who has to defend.
Driven very nicely to cover point by Markram, fielded just as well, at cover point, but Josh Inglis.
Solid defence from Markram.
Another good stop from Inglis at cover point, the newcomer to the team for this Test leaping about.
Markram leaves the last, a 141km/h delivery outside off.
This hasn’t worked out in Australia’s favour
Simon, mate, we were expecting play to swing in Ausralia’s favor when you stepped into the helm – but SA are still rolling along without a care in the world!
– Mike
The scoring rate has come down since lunch though, so that’s something.
39th over – Lyon continues
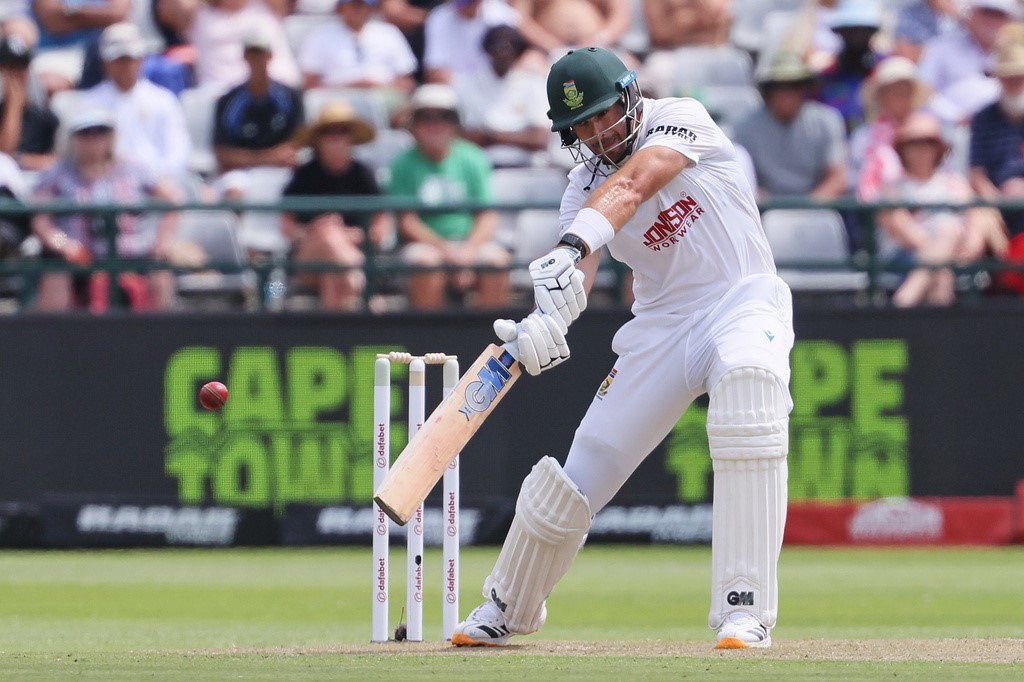
Markram defends as Lyon drifts the ball across from around the wicket, the ball going from leg to off through the air, doing nothing off the surface though.
Markram clips off his pads but there’s no run to midwicket.
He takes a single now to cover, a nicely timed shot.
Lyon had raced through the first four balls of the over, but takes a bit of time as Bedingham takes strike, a short leg coming in.
Bedingham takes a single, clipping the ball past that short leg.
Markram clips the ball off his pads to finish, Marnus yelling excitedly like a toddler seeing snow for the first time as the South African opener defends comfortably.
All that yelling is no doubt thirsty work, so the players will have a drink.
It’s trauma, Derek
People will hate me for this, but I find it wonderfully entertaining when the Australian cricket team does poorly. All the handwringing/recriminations/over analysis that takes place makes for great theatre!! I’m looking forward to all the punters and pundits losing their minds over the next few days… 🙂
– Derek
39th over – Mitch Starc is going to carry on
A bit of reorganisation from Starc, as the left armer comes back over the wicket.
Markram cuts away for a single.
Starc continues over the wicket, and Bedingham takes the same approach to Starc’s slightly-too-short delivery, fending it away and down to wide third man for a single.
Leg side from Star, Markram takes a couple down to deep backward square leg.
Wide from Starc, and Markram chased it. Not a great shot to play by a man on 75, who should know better. It was too wide even for Markram to chase though so he survives.
Outside off, rising delivery across the face of Markram, who leaves it well alone.
Too straight, Markram pulls to deep backward square for a single to make it five runs from the over.
Pazball?
The selection calls have a lot of the worst bits of Bazball about them. ‘Saw a clip on YouTube’ gear… ‘smashing in the nets’. ‘We know better’. ‘Domestic form doesn’t matter’ It was so unfair that they did that to Nic Maddison. He wasn’t ready and they must have known that. Everyone else did ahead of time. Maybe on a months time after a few shield games…
– Chris
38th over – Nathan Lyon comes back into the attack
Markram uses his feet and pushes to extra cover. No run.
Now he stays back and clips to midwicket for a single.
Bedingham clips to midwicket for no run, but then scampers through for a single next ball.
Lyon holds up his hand as Markram defends deep in his crease.
And then takes a single to end the over.
Not a lot doing that set of six for Lyon.
37th over – Starc continues around the wicket
Markram pushes square outside off to deep backward point for a single.
Bedingham takes a single into the leg side.
Oh, the lack of pace through the middle of the pitch is on display again as Markram pulls, miscues, and takes a single to leg.
CHANCE! Bedingham pulls, the ball hits high on the bat, loops up into the leg side and falls safe between two fielders at midwicket. This is not a pitch to be playing with a horizontal bat. They take a single.
Markram pushes into the off side, and another single is taken.
Starc bowls a big no ball, ruining the only dot ball of this over.
FOUR! Bedingham slashes a cut shot away outside off, well waited for and perfectly timed. A good shot to end a productive over.
36th over – Hazlewood has another
Good ball! A tight leave from Markram, who may have been worried as the ball angled back in and came desperately close to knocking the off stump back.
Markram pushes to backward point for a single.
Solid defence, with the straightest bat possible, by Bedingham.
Hazlewood is keeping it tight, Bedingham fending solidly.
FOUR! Oh my word. Bedingham has played two scoring shots since he’s come into the action and both of them have been works of art. Another exquisitely timed stroke, this time back down the ground, past Hazlewood and beyond the trundling chase of Travis Head.
Bedingham drives to cover, this time finding the man.
He’s seeing it beautifully.
35th over – Starc comes back into the attack
FOUR! And he is driven superbly, not even Lewis Hamilton could drive so well, as Markram shows there, hitting nicely through the line of the ball, well away from his body in a perfect illustration of how well he’s seeing the ball. The pitch is playing like a dream – great pitch to bat first on.
Markram defends back down the pitch as Starc straightens his line, the two slips and a gully waiting with bated breath and open palms for an offering from the South African opener.
Oh, bit of a miscue there, Markram pulls and gets through the shot far too early, the ball hitting him on his back before bouncing through towards those two slips. Not a quick pitch, that much is clear.
Markram clips to the leg side for a single.
Bedingham drives to point for no run to end the over. He’s middling these deliveries pretty much straight away.
34th over – Josh Hazlewood comes into the attack
Thanks Chris, finally a wicket in the penultimate over of your spell. See if I can do any better over this session, shall we?
Bedingham is on strike and he defends as Josh Hazlewood comes into the attack, Australia looking to strike while the iron is lukewarm.
Oh, edgy from Bedingham – he fends to Cameron Green at gully on the bounce.
Bedingham, with just a single Test ton and an average of 35.50, defends the next couple with a desperately straight bat.
FOUR! Bedingham has seen enough from Hazlewood to assess this pitch and crushes the ball with an exquisite square drive to the cover point boundary. That’s sublime, a stunning way to get off the mark.
He defends the last, the boundary the only score from the over.
33rd over – Cummins bowls his first maiden of the match
A bit of a delay before this over as the umpires indeed check that stumping chance, and it’s not out after a few replays.
Cummins into Markram, who defends into the off side. He’s got a big role to play now that Ackerman is gone.
Australia would love to get two new batters at the crease.
Cummins goes fuller and Markram meets the ball with another lovely off drive, but can’t beat the man at mid-off.
Cummins goes wider of the crease and fuller and Markram hammers it back at him with a full-blooded drive, which almost takes Cummins’s head off in his follow-through.
A good leave from Markram as Cummins sends one wider outside off stump.
Cummins has his first maiden of the match as Markram crunches another one straight to the fielder in the covers.
Australia finally building a little bit of pressure.
And with that, I hand the reins over to Simon Smale for the rest of this session.
32nd over cont. – Bedingham comes to the crease
Right then, a chance for Australia to build some pressure here as David Bedingham comes to the crease.
A good delivery first up and Bedingham knocks it down the pitch for a dot.
A muted stumping appeal as Lyon spins one well down leg side and Carey whips off the bails. Some more manufactured excitement from Marnus at first slip.
WICKET! Lyon removes Ackerman for 95!
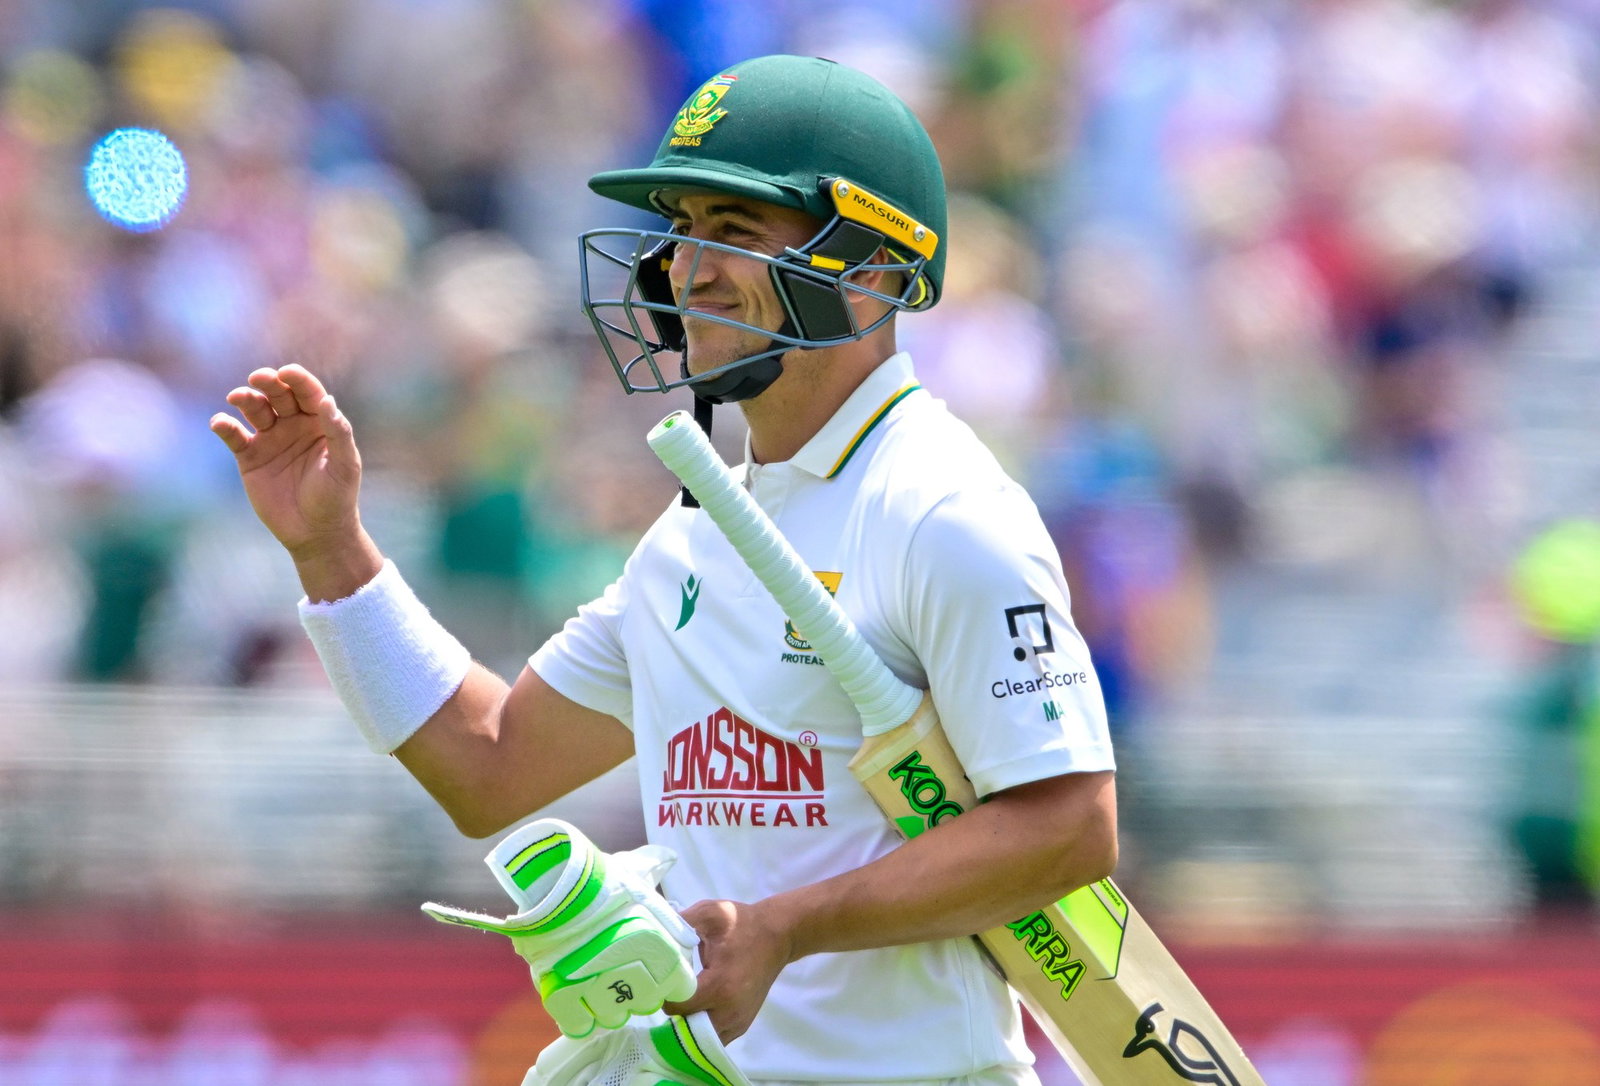
Australia finally has a wicket, and it’s safe to say that one was coming!
Nathan Lyon preys on Marques Ackerman’s impatience as he floats another one wide outside off and Ackerman charges but gets nowhere near the ball.
He’s stumped and he’s gone for 95 off just 94 deliveries, five short of what would’ve been a well-deserved maiden ton.
Marques Ackerman st Carey b Lyon 95 (94), FOW: 1-158
32nd over – Lyon to continue
Lyon floats one wide outside off and Markram knocks it down to the man in the deep for an easy single.
He floats the next one up wide outside off and Ackerman mistimes it down the pitch. A real tempter there.
Another teaser, but this time Ackerman shows restraint and leaves it alone nicely.
31st over – Ackerman continues to chance his arm against Cummins
Cummins starts around the wicket with a full one to Ackerman, and Ackerman backs away slightly but defends. That was a bit of pre-meditated movement from the batter there.
Cummins goes short with the next one and Ackerman decides to leave it alone this time, for one of the first times today.
Ackerman again looks to back away but Cummins follows him and he ends up flicking it into the leg side for a single.
Cummins goes short and Markram pulls him all along the ground for a single out to the man in the deep.
FOUR! Cummins goes short and Ackerman takes it on again, doesn’t get all of it, but gets it fine past a diving Carey for another boundary! He continues to look to back away against Cummins.
More regulation cricket to end the over as Ackerman punches a good Cummins delivery down the pitch for no run.
30th over – South African openers bring up 150-run stand
The Lyon-Ackerman battle continues.
Ackerman comes charging down the pitch and Lyon sees him and fires it wide, Ackerman is able to get some bat on it, so avoids getting stumped.
The next delivery is whipped through mid-on for a single by the left-hander.
Markram punches the next delivery down to long-on for a single to bring up the 150-run partnership for the opening wicket.
More circumspect from Ackerman that time as he knocks a ball off the back foot into the off side for a single to move into the 90s.
Lyon leaves one wide outside off stump and Markram resists the temptation by shouldering arms.
He follows up with an identical delivery and Markram again leaves it alone.
29th over – Cummins resumes attack after lunch
Cummins decides to have a go himself after lunch and his first delivery is knocked into the leg side for a single by Markram.
These two have rotated the strike beautifully all day so far, it’s not allowed Australia to build any semblance of pressure.
Cummins comes around the wicket to Ackerman and Ackerman flicks it into the leg side. There’s a brief mix-up as the pair decide against a single, but ultimately no danger.
Cummins pitches outside off and Ackerman unfurls another beautiful cover drive and picks up two runs to move to 87 off 81 deliveries.
Virtually the same delivery again, but this time Ackerman’s drive can’t beat the infield.
Another short delivery from Cummins and Ackerman goes for another pull, but again doesn’t make great contact and he’s lucky to not get caught at fine leg. Picks up a single in the end.
Ackerman pulled up a little bit after the shot, and hopefully he’s not done too much damage there. We’ll keep an eye on it.
Cummins comes back over the wicket to end the over to Markram, and he defends the final ball into the off side.
28th over – Lyon drops tough chance after lunch
Nathan Lyon to get the first look at things after the break, and he’s got Marques Ackerman on strike.
Ackerman has shown a willingness to attack the offie.
The first delivery is pitched just outside off and Ackerman leans forward and defends.
DROPPED! Ackerman charges down the pitch and hammers one straight back at Lyon and Lyon barely has time to react. The ball cannons off his hands and goes down to the boundary but Josh Hazlewood makes a terrific dive and saves two runs.
Harsh to call that a drop, but technically it is one.
Ackerman works the next delivery down to mid on for a single.
Lyon comes over the wicket to Markram, and Markram works the first ball away on the leg side for a dot.
Wider outside off and Markram cuts away to the sweeper in the deep for a single.
Ackerman drives the final delivery down the pitch and Lyon makes an excellent diving stop with a full-length dive to his right to end the over.
The second session is about to get underway
Marques Ackerman and Aiden Markram making their way out to the middle.
Ackerman is swinging his arm around like he’s got a sword in his hand ready to slice Australia apart.
Pat Cummins gets his charges in a huddle and offers some words before the Aussies make their way to their fielding positions.
What will this second session bring? Australia will hope for a lapse in concentration from the openers after the break.
Let’s see what happens eh?
Why did Cummins bowl first?
Hey Chris, can you please explain, in layman’s terms, Capt Pat’s logic in electing to bowl first?
– Mike
It’s the million-dollar question, Mike.
The commentators seem to think he was protecting an under-strength batting line-up with no Smith, but that doesn’t make sense either because this seems the perfect surface to put a weak batting line-up to get some confidence on.
When they do eventually bat, the pitch will be a little more worn down.
The struggles reverberating all around the world
hi team, listening and following in Spain. This is horrible. Is it the wicket? Our team? What is going on???
– Steph in Spain (but from Melbourne)
Hi Steph,
I’d imagine the Spaniards are saying something like “Este equipo es muy muy mal ahora” about the Australian performance right now.
The streets are absolutely FUMING!
We have lost this test match. Not picking Scott Boland is just embaressing, chosing to bowl defies any logic, does anyone know why ? My prediction, South Africa declaring tomorrow for more than 450. Australia all out for less than 150. Cameron Green dismissed for less than 20. Marnus less than 20. Time to watch something else and forget about it. Don’t mind if they are doing their best and getting beaten, but it’s frustrating when the selectors and captain just make such obvious mistakes. Makes you wonder about the decision making process, or lack of. Surely the selectors have to be sacked after this series ?
– Jeff
Typical of Cummins and selectors to take this decision in the light of their previous decisions when they drop Boland. The Elite group stand up, and once again are found out. It isn’t “Boland v Lyon” it is Boland against the Three Musketeers – who have failed utterly, despite their Captain’s glee in putting South Africa in. Time to change captains, and with it, one selector.
– Tom Thompson
First session is a disaster. The NSW quartet of bowlers have shown how old they are. Tis time for them all to retire. Boland should have been the First player picked this test – Cummins the last. He is no longer a strike bowler and should be dropped.
– Dan
I can see this getting very ugly from here – South Africa to rack up 600 odd for not much by midway through the 3rd session tomorrow, declare and take 3 or 4 wickets out of Australia’s dysfunctional batting lineup after chasing leather for the best part of two days. Just looking so easy for South Africa.
– Scott
Here’s a few of the comments that have come in during the lunch break as we get set for the second session.
It’s safe to say the Australians aren’t too happy with what’s currently being served up.
LUNCH: South Africa 0-140 (Markram 56, Ackerman 82)
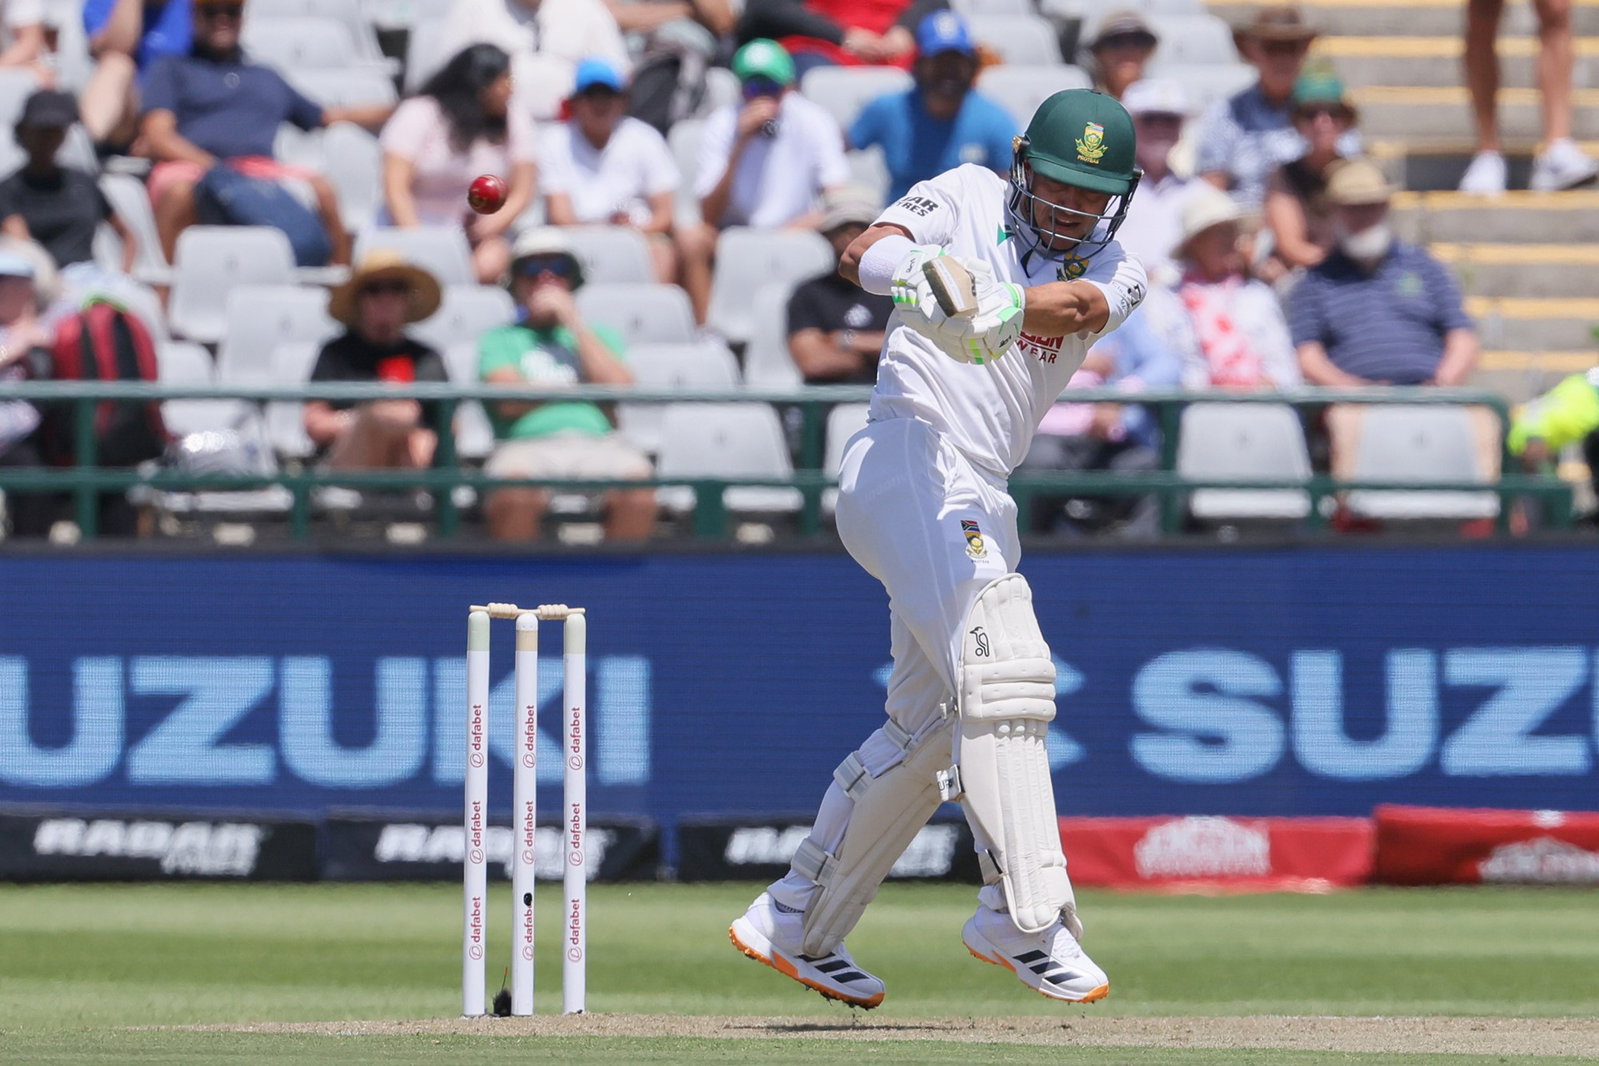
It has been a dream morning for South Africa, and an equally nightmarish one for Australia.
South Africa received a pre-match boost when Steve Smith was ruled out and then received another gift when Pat Cummins inserted them in on a wicket that looked very good.
That has proven to be the case because South Africa is unbeaten at lunch and they’ve gone at over five runs per over.
It is the first time since the 2005 Edgbaston Test that Australia has sent an opposition in and conceded a 100-run opening partnership.
Aiden Markram began the more fluent of the duo, but after drinks, Marques Ackerman took charge and has raced to 82 off just 75 deliveries.
Markram will consider himself lucky to still be there after being dropped on 39 by Travis Head off the bowling of Mitchell Starc.
He’s also notched a half-century and will look to add another century against the old enemy.
None of the Australian bowlers have looked like getting a wicket really, and it’s poised to be a long, long afternoon.
27th over – Cummins returns to replace Starc
The Australian captain takes the last over before lunch after his horror decision to bowl first.
He begins with the first delivery on a good length outside off and Markram defends it into the off side.
A similar delivery and Markram knocks it into the off side and picks up a quick single. More good running from the Proteas openers.
Cummins goes around the wicket and back of a length to Ackerman, who drops it at his feet on the off side and picks up another quick single.
Cummins goes fuller again and Markram reaches into a forward defence. That’s probably one he can leave alone with the lack of sideways movement here.
A little straight from Cummins and Markram again defends. Just one ball away from the perfect session for the Proteas here.
FOUR! EDGED! Cummins catches the edge with the final ball of the session but the ball squirts past second slip for another boundary.
26th over – Markram brings up his half-century against Lyon
We’ve got five minutes until lunch time, so you’d think two overs left.
Lyon starts over the wicket to Markram and the first delivery is knocked into the leg side for no run.
The second one is pretty identical and Markram knocks it into short leg.
FOUR! Short and wide from Lyon and Markram rocks back and cuts it away for a boundary.
Lyon fires it in a little quicker and Markram defends it down the pitch comfortably.
FOUR MORE! What timing this is! Markram punches Lyon through the covers on the back foot and brigns up his half-century off 81 deliveries.
Markram has looked terrific right from the first delivery today.
Lyon goes around the wicket to end the over and Markram knocks him down to long on for a single to end the over.
25th over – Ackerman hits Starc for four consecutive boundaries
With the lack of movement here, I wonder whether the Aussies consider sandpap- I’M KIDDING, I’M KIDDING.
FOUR! Starc continues and his first one is short outside off and it’s absolutely flayed through backward point for another boundary.
FOUR MORE! Oh Ackerman is IN in now! Starc full and straight and Ackerman whips him over midwicket for another boundary. Shades of Jayasuriya in that one from the left-hander.
FOUR AGAIN! Oh he’s seeing it like a beach ball now. Starc drops his length back and Ackerman leans back and late cuts it past the slips for a boundary.
Ackerman has raced to 76 off just 72 deliveries. He’s been dynamite since the drinks break. A completely different batter.
FOUR IN A ROW! Poor bowling from Starc this, he gets short and wide and Ackerman just putts it over backward point for another boundary!
Much better from Starc as he angles one into the stumps, and Ackerman defends and is called through for a quick single by Markram. Terrific running. That’s been a hallmark of this partnership.
Markram works the final ball of the over off his hips into the leg side for a single. 18 runs off that Starc over. Australia looking lifeless out there.
24th over – Lyon returns to replace Cummins
Cummins has taken himself off and brought Lyon back into the attack.
He starts around the wicket to Markram, who picks up a leg bye with the first delivery of the over with an attempted flick off the hips.
Ackerman charges down the track again and defends into the off side to pick up a single. He’s not letting Lyon settle at all.
Lyon goes a little fuller and faster and Markram defends well.
Markram works the next one through the leg side for a single. He’s looking to lock in again after that momentary lapse last over.
Lyon fires another one in at Ackerman’s pads but Ackerman works it into the leg side for a single.
Lyon goes over the wicket with the final delivery to Markram, and Markram defends it well on the back foot.
23rd over – Head drops a sitter to give Markram a life
Mitchell Starc is back into the attack, replacing Josh Hazlewood.
He starts over the wicket to Markram and the first ball is comfortably defended into the off side.
Down the leg side with the next one and Markram will feel like he’s missed out there as he fails to make contact on the flick.
Starc gets straighter and it’s again back of a length and Markram defends solidly down the line.
DROPPED! Oh my goodness, Travis Head has shelled it! Aiden Markram with a very loose shot to one outside off and he mistimes it into the covers and Head spills an absolute SITTER.
Starc gets straighter and Markram inside edges it into the leg side for a single. Whew boy, what a let-off that is…
Starc goes shorter to end the over and Ackerman defends down the pitch. He’s now 62 off 67 deliveries.
22nd over – Proteas bring up a 100-run partnership
Cummins starts over the wicket to Ackerman, who defends it into the off side and picks up another quick single.
These two continue to rotate the strike beautifully, and the Aussie bowlers can’t get a rhythm going so far.
Cummins is a back of a length outside off and Markram punches it into the off side for a dot ball.
The next delivery is straighter and Markram defends it into the leg side this time.
Cummins goes shorter and Markram goes for another pull shot and he mistimes this, but it lands safely in the deep and he picks up a single.
SIX! Ackerman has laced this hook shot! It’s another short one and he just gets inside it and helps it on its way for a maximum. Very well played that one!
FOUR! Poor bowling from Cummins. This one is on Ackerman’s hips and asking to be sent to the boundary and he whips it fine and brings up the 100-run partnership for the opening wicket.
21st over – Ackerman brings up the first half-century of his career
Hazlewood starts with a short one and Ackerman pulls it away to fine leg to bring up his half-century off just 62 deliveries!
That is Ackerman’s first Test 50 and he looks absolutely thrilled, but he’ll want to make it a big one now.
Hazlewood comes back over the wicket to Markram, who again defends into the leg side. He’s definitely been quieter after the drinks break as Ackerman has motored.
FOUR! Imperious stuff from Markram! Hazlewood pitches it up and it’s wider outside off and Markram climbs into a cover drive at the top of the bounce. More signs that this is a great batting surface. That looked Kevin Pietersenlike.
Hazlewood gets straighter next up and Markram works it into the leg side for a single.
Hazlewood back around the wicket to Ackerman.
Ackerman awkwardly inside-edges a defensive shot into his pads, but he’s able to pick up a quick single. Good running.
Well left by Markram to end the over as Hazlewood tempts him with another teaser outside off stump.
A horror morning for the Aussies
Why would Australia choose to bowl on a day like this? Because the batting order has changed so much and they want to have time to settle the nerves? Also, how long without a wicket before we can start saying they should have picked Scotty?
– Confused
How is it even possible to decide to bowl first? Like they must have had reasons, wrong as they were. Surely they weren’t just that faithless in the batting line-up?
– LW
Wow, is this the most incompetent management of the Australian cricket side? 1) leave out Boland 2) Win toss and bowl 3) SA 72/0
– PK
“This is getting ugly now,” says former Australia opener Phil Jaques on commentary for ABC Sport.
Fair to say it’s looking like an absolute shocker of a decision to bowl first from Pat Cummins, with the South African openers cruising towards 100 at more than four runs an over.
The pitch looks like an absolute belter, the sun is beating down and Nathan Lyon has already bowled four overs.
“There’ll be a few players out there going ‘what have we done?’,” Jaques says.
“Pat Cummins will be regretting that decision to bowl first. It did look like a good surface to me.
“I thought it might have played a little slow in the morning, but it’s actually been a little bit quicker than I thought it would be.”
20th over – Cummins replaces Lyon in the attack
Pat Cummins brings himself back into the attack and his first delivery is a full one that’s drilled down the wicket from Ackerman. A good stop from Cummins in his follow-through saves a boundary.
Cummins goes shorter with the next one and Ackerman defends well on the back foot. He’s looked more solid with every passing delivery.
Cummins goes shorter with the next one and Ackerman swivels into a pull shot, but can’t beat the fielder at midwicket.
Plenty of short stuff from the Aussies to Ackerman so far, and he hasn’t looked all that comfortable with it.
Another short delivery and this time Ackerman gets more on the pull shot and the ball squirts past the leg slip fielder for a single. He’s moved to 49 now.
Cummins goes back over the wicket to Markram and his back of a length delivery is defended into the off-side by the right-hander.
Cummins goes wider to end the over and as he has done all morning, Markram leaves it alone.
19th over – Hazlewood bowls his first maiden over
South Africa going at 4.56 per over. Hazlewood to continue to Markram here.
Starts with a tired old delivery well down leg side that Carey has to dive for. Just 133kph that one.
Corrects with one outside off stump but Markram leaves comfortably. Not a lot of movement at all for Hazlewood now.
Hazlewood gets fuller with the next delivery and Markram defends it into the off side.
Straighter from Hazlewood and Markram punches it to mid-on, briefly thinks about a quick single, but decides against it.
Another straight one from Hazlewood and this time Markram defends it down to mid-off. Very watchful here.
Hazlewood ends the over with a wider one and Markram leaves it alone. That’s Hazlewood’s first maiden of the day and just the second of the entire innings.
18th over – Ackerman takes the attack to Lyon
FOUR! Ackerman with another reverse sweep, this one is in the air, but it’s in the gap for a boundary. He’s not letting Lyon settle here.
Ackerman comes down the pitch next but is beaten in flight by Lyon and has to settle for a forward defence. A big laugh from Marnus in at first slip.
Lyon fires the next one in at the stumps and Ackerman defends down the pitch.
The next one is floated up and Ackerman defends well again. A fascinating battle this one.
Lyon follows up with a shorter straighter one and Ackerman flicks it into the leg side for a couple.
FOUR MORE! Beautiful shot to end the over. Lyon gets a tad shorter outside off and Ackerman punches him off the back foot through the covers to move to 48.
17th over – Hazlewood continues to test Ackerman with short stuff
Things are looking dire here for Australia. Here’s Hazlewood continuing to Markram.
It’s a good delivery first up, seaming into Markram and he’s struck on the thigh pad. Probably the second time he’s been beaten today.
Another good delivery from Hazlewood, but this time Markram knocks it into the off side and picks up a single.
Hazlewood comes around the wicket once again to Ackerman and the first delivery is defended well by the left-hander.
Very full from Hazlewood next up, almost a wide yorker and Ackerman digs it out into the off side for another dot. Probably could’ve left that one alone.
A short delivery this time and Ackerman once again fails to get ahold of a pull shot, but he gets away with it and picks up a single down to fine leg.
Hazlewood finishes with a straighter one to Markram, who punches it into the leg side for no run. The partnership now 72 between this pair.
16th over – Lyon replaces Cummins after drinks
Lyon starts around the wicket to Markram, who works him into the leg side for a dot to start the over.
The second one is a similar delivery, but this time Markram beats the infield and picks up a single.
SIX! BANG! Ackerman charges down the track and absolutely leathers this one into the stands. He’s looked a different man after drinks has Marques!
Ackerman feigns like he’s going to charge again and Lyon fires one in and it’s a dot.
Lyon fires one fast down the leg side and there’s a big appeal from the Aussies, but they decide to go against the DRS. Looked like Ackerman’s bat hit the ground on that rather than the ball catching the edge.
Fired in again from Lyon to end the over and Ackerman defends well.
15th over – Hazlewood returns as Ackerman motors along
Josh Hazlewood at the top of his mark, replacing Nathan Lyon after the drinks break.
FOUR! He starts around the wicket to Ackerman but this is too short and wide and Ackerman uppercuts him to third man over the slips cordon.
A better line next up and Ackerman shoulders arms. He’s moved to 25 off 40 deliveries now, a nice start this.
FOUR MORE! This one is punched through backward point, lovely touch from Ackerman, and the ball beats a diving Travis Head to the boundary rope. That’s the shot of a man that’s looking more comfortable out there.
Hazlewood gets straighter with the next delivery and Ackerman defends him into the off side.
Another short one from Hazlewood and this time Ackerman pulls it into the leg side for a couple.
Hazlewood is fuller and outside off to end the over and Ackerman shoulders arms. Both openers now on 31.
14th over – South Africa safely through to first drinks break
Cummins gets straight to start the over and Markram knocks it into the leg side for a quick single. Josh Hazlewood, who is fielding at mid-on, misfields as he looks to pick it up and throw down the stumps at the bowler’s end.
Cummins goes around the wicket to Ackerman, who once again inside-edges a flick onto his pads and picks up a single. There’s a muffled LBW appeal but no review to follow.
Outside off with the next delivery and Markram shoulders arms once again.
Simon Katich now on commentary waxing lyrical about the Boland axing, and I’ve got to say I agree with him wholeheartedly.
Identical stuff with the next delivery from Cummins as Markram again leaves it alone.
Cummins gets a shot out of Markram this time, but it’s a comfortable forward defence into the covers.
A little fuller and straighter to end the over and Markram defends once again and it’s time for a drinks break!
13th over – Ackerman and Markram bring up 50-run stand
Lyon stays around the wicket to Ackerman as he begins his second over.
The first one is floated outside off and Ackerman leans into a forward defence.
A reverse sweep! Ackerman absolutely laces it, but it’s straight to the fielder. Gives you a sign of his confidence.
Lyon gets quicker and straighter but Ackerman does well to punch it into the leg side and he picks up two to bring up the 50-run partnership for the opening wicket.
It’s been a lovely start from these two. That partnership has come off just 75 deliveries.
Lyon’s next one is a little shorter and Ackerman cuts it straight to the fielder.
He goes for another full and fast one next up but Ackerman is equal to the task.
A good delivery to end the over and Ackerman punches it into the covers. Tidy stuff from Lyon.
12th over – Markram continues to attack Cummins
Cummins starts with a good delivery outside off and Markram again comfortably shoulders arms. Another really assured leave.
FOUR! Another boundary for Markram. Cummins goes short and straight this time and Markram pulls him beautifully to the square leg boundary. Lovely control that time.
BEATEN! That’s better Pat! Cummins goes fuller outside off and lures Markram into a forward defence and the ball whizzes past the outside edge.
Full and too straight from Cummins and Markram whips it off the pads through square leg for two runs. He’s now 30 off 39 deliveries.
Another teaser from Cummins and Markram does well to leave it along once again. South Africa going at over four runs an over here.
A good delivery to end the over from Cummins and Markram defends it into the leg side for no run.
11th over – Lyon gets a chance with the new ball
This is interesting! I cannot remember seeing Nathan Lyon this early in an innings in a long time.
The off-spinner replaces Mitchell Starc, and his first ball around the wicket to Ackerman is defended into the off side.
Lyon’s next one is a little quicker, fired in at the pads, and Ackerman gets his bat down in time. There is a brief and faint appeal.
Ackerman shoulders arms with the next delivery, lots of sounds from Marnus at first slip as per usual.
Another straight delivery from Lyon and Ackerman defends once again. Tidy stuff from Lyon so far.
Ackerman charges down the pitch next up and doesn’t quite get all of this one, the ball once again squirts away off the inside edge and he picks up a single.
Lyon stays around the wicket to Markram, who punches him down the ground for a single to keep the strike.
10th over – Markram sends Cummins to the boundary again
Cummins continues to Ackerman and starts with a full delivery which the left-hander punches into the off side for no run.
He’s got a short leg and a leg slip in, so I don’t think that another short delivery is too far away here.
Cummins does go short, but this time Ackerman controls his pull shot well and picks up a single to fine leg.
FOUR! Another brilliant shot from Markram! Too short and wide from Cummins and Markram laces him through the covers. That one again sat up and Markram looked like he had heaps of time.
A better line from Cummins next up and Markram defends it down the pitch. Again, looking really, really solid out there.
A carbon copy next up as Markram again defends Cummins down the wicket.
Cummins goes a little wider to end the over and Markram shoulders arms. He’s left the ball very well so far today.
9th over – Markram continues to look very fluent out there
Feels like Australia needs a breakthrough here. Starc to continue.
His first delivery for Ackerman is way, way down the leg side, poor delivery.
A better second delivery and Ackerman drops it into the leg side and takes a quick single.
Simon Katich is in commentary now and he says he cannot believe Cummins chose to bowl first on this pitch.
Starc back around the wicket to Markram who once again defends comfortably into the off side for no run.
FOUR! This is prime Markram folks. Starc gets fuller and Markram punches it through the covers at the top of the bounce for a boundary.
Starc back over the wicket after that boundary and Markram shoulders arms.
A good short delivery to end the over and Markram defends it on the back foot for no run. He’s moved to 19 off 30 deliveries.
8th over – Cummins replaces Hazlewood
The Australian captain has decided to take matters into his own hands as he replaces Josh Hazlewood.
His first delivery is way down the leg side, a real loosener.
A better delivery from Cummins next up and Ackerman defends it into the off side for a single. Good running from the openers there.
A good delivery next up to Markram, who shoulders arms to one outside off. A hint of movement away from the right-hander for Cummins.
Markram showing good patience here. Shoulders arms to another teaser from Cummins well outside the line of off stump.
SIX! WHOA! Cummins drops one short and this is slow bounce, Markram pulls him into the stands for a maximum. He’s hit that in front of square, which tells you how much time he had to see that one.
Ominous signs here for Australia early on.
Markram is seeing it like a beach ball here. Cummins goes fuller outside off with the final delivery and the right-hander punches it into the covers, but can’t beat the fielder.
7th over – Starc almost has Ackerman caught with short one
Mitchell Starc into his fourth over with the new ball here, gets another look at Ackerman.
BEATEN! That’s our first play and miss of the day! Starc goes back of a length and Ackerman awkwardly fishes at it.
Starc goes shorter and wider, tempting Ackerman into a false stroke, but the opener thinks better of it and shoulders arms.
CLOSE! Starc goes shorter again and Ackerman mistimes a pull and he’s almost caught at leg slip! Ackerman picks up a single down to fine leg after all of that.
Starc back around the wicket to Markram and Markram crunches a shot into the covers for no run. He’s looked really solid so far, Ackerman less so.
Starc gets straighter on a back of a length delivery and Markram defends it into the leg side for no run.
Another short delivery to end the over and Markram defends comfortably on the back foot.
6th over – South African openers continue to look solid
Hazlewood to continue to Markram, he starts by sending the first ball of the over down the leg side.
The next ball is a little wider outside off stump and Markram looks to crash it off the back foot again but hits it straight to Nathan Lyon point. He’ll feel he’s missed out there.
Straighter from Hazlewood next up and Markram defends solidly down the wicket.
Hazlewood strays onto Markram’s pads and the right-hander flicks it to fine leg for a single to get off strike.
Another good shot for no runs! Hazlewood gets fuller and Ackerman drives well, but can’t beat mid-off.
Hazlewood comes around the wicket for the final ball of the over, and Ackerman works him into the leg side for a single as short leg fumbles the ball.
5th over – Starc roughs up Markram with a short one
Starc will have his first go at the left-handed Ackerman here.
Starts with a short delivery and Ackerman briefly thinks about fishing at it but then lets it go through to Alex Carey.
Starc gets fuller with the next delivery and Ackerman is a little uncomfortable as he punches into the covers for a single. Ackerman’s head fell over trying to play that one, not great.
Starc comes around the wicket to Markram.
The first one is back of a length and aimed at the body, but again defended pretty comfortably by Markram. He’s probably got to be fuller than that with this new ball.
Starc says you know nothing De Silva, and follows through with a 149kph brute of a short delivery that catches Markram by surprise! The ball catches Markram on the wrist and luckily for him, floats into the leg side and they pick up a single.
Starc’s next ball is a fuller to Ackerman and he gets some movement, but Ackerman shoulders arms.
FOUR! Too full and too straight from Starc and Ackerman flicks it away for a boundary through midwicket. He was hunting the LBW there I reckon, Starc.
4th over – Hazlewood shows first signs of some movement
A very, very good leave from Ackerman to start with as he shoulders arms to a delivery juuust outside off stump. The ball swings a bit on its way to the keeper after passing the stumps.
Hazlewood gets fuller with the next delivery, but Ackerman mistimes a drive, it’s another inside edge there. He’s had a few of those so far today.
A good short delivery aimed at the body, Hazlewood’s got a man in close on the leg side as well, but Ackerman defends well.
FOUR! A hint of inswing for Hazlewood but he strays onto the pads and Ackerman flicks him very fine for a boundary.
Good cricket all around! Hazlewood is full and wider outside off and Ackerman meets him with a glorious cover drive, but it’s stopped well in the covers so he’s got to settle for a single.
Hazlewood is defended down the pitch by Markram with the final delivery and that seemed to stick in the wicket a little as the ball ever so briefly spends some time in the air before dropping onto the pitch.
3rd over – Markram breaks loose with some glorious boundaries
Starc begins his second over with a back of a length delivery which Markram comfortably defends into the off side.
Graeme Smith has come into the commentary box with his son in between deliveries and my goodness, that is a straight copy paste!
FOUR! Lovely shot! Starc strays onto the pads and that’s easy pickings for Markram, who whips him off his hips to the square leg boundary.
A better line that time from Starc and Markram punches it down the ground, some good fielding behind the bowler keeps him on strike.
Starc gets outside off with the next delivery and Markram punches it into the covers. No movement in the air so far for Starc.
Starc with another straight delivery and Markram again defends comfortably.
FOUR! Oh this is glorious from Markram! Starc gets shorter with the final ball of the over and Markram hops onto the back foot and punches it through the covers. That was Jacques Kallisesque. A sign that this is a very, very good pitch.
2nd over – Hazlewood to share the new ball with Starc
Josh Hazlewood, as he has done so often, is Mitchell Starc’s new ball partner.
Hazlewood starts with one floating across the left-handed Ackerman, who shoulders arms comfortably.
He gets straighter with the next delivery and Ackerman gets an inside edge onto his pads as he plays a forward defence.
Shorter from Hazlewood and aimed at the body and Ackerman hops on the back foot and defends.
We’ve got our first runs of the day! Hazlewood is again straight and Ackerman gets another inside edge through to the leg side and picks up two.
The commentators are stunned Australia has bowled first on this surface, they’ll have to strike early with this new ball.
A good shorter delivery next up from Hazlewood and Ackerman drops the wrists and lets it fly through as the ball kisses his shirt sleeve on the way.
A fuller delivery to finish the over and Ackerman punches it to a very wide mid-off.
South Africa vs Australia
1st over – Starc ready to rip against Markram and Ackerman
Mitchell Starc is at the top of his mark and ready to let rip.
Aiden Markram and Marques Ackerman stride to the crease for South Africa to kick things off.
Markram has been conspicuously quiet in this series so far. He usually LOVES a big one against the Aussies. Will today be the day?
The first one from Starc is a bit of a teaser, wide and back of a length outside off and Markram shoulders arms.
Starc’s second delivery is a little fuller and straighter as well, but Markram again safely leaves it alone. A hint of inswing from Starc, but not a whole lot of movement, to be fair.
Three leaves in a row for Markram as Starc again sends one wider outside off stump.
Make that four leaves! Markram comes a little closer to offering a shot here, but again shoulders arms to one outside off.
FIVE LEAVES! CAN WE GET SOME ACTION PLEASE?! BOOOOOOOO!!! (Kidding, this is good Test match cricket children).
Finally some bat on ball, Starc gets a little fuller and Markram defends it down the wicket. We start with a maiden over.
Sandpapergate looms large
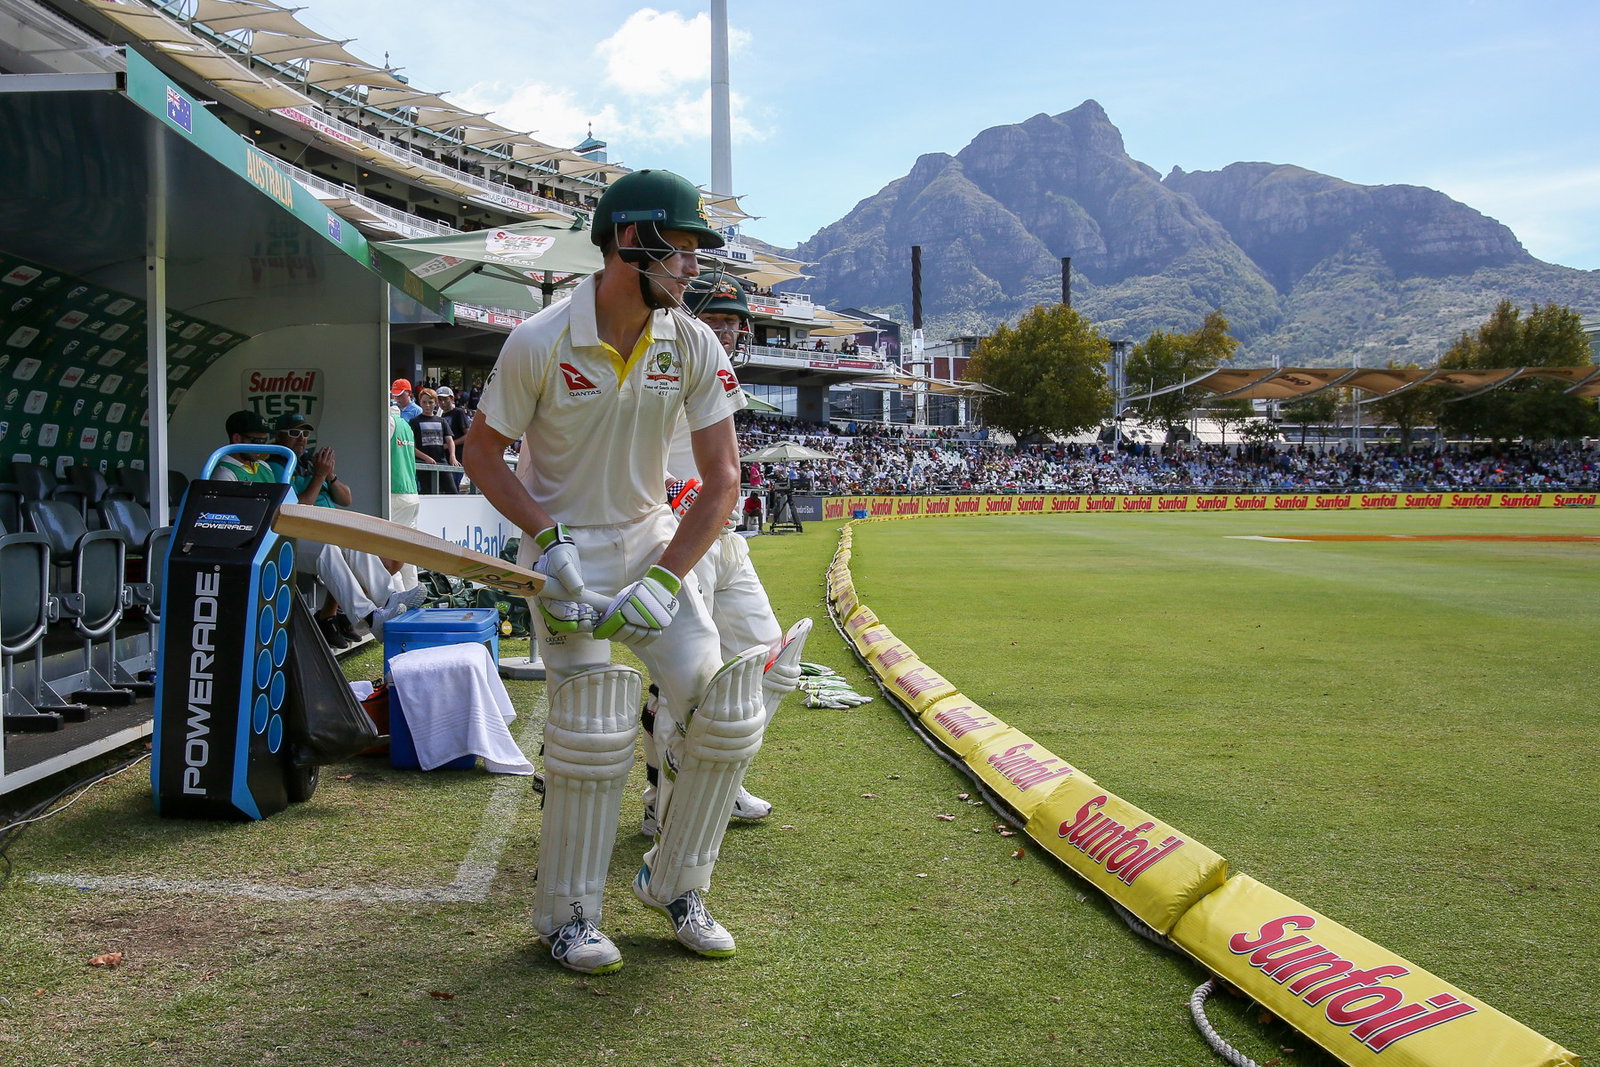
Well, here it is.
The scene of the crime.
Eight years ago the actions of the Australian team, pinned on to David Warner, Cameron Bancroft and Steve Smith, forced the nation to confront the ugly truth about the alleys of disrepute its favourite team had ventured down in its quest for cricketing superiority.
The outcome was sandpapergate. The build up featured an awful lot more.
The downside is that Smith doesn’t have a chance to avenge for what happened here eight years ago.
Nevertheless, here’s a reminder of how a virulent series gave rise to Australian cricket’s uncomfortable sporting scandal.
It’s anthem time in Cape Town!
The two teams are out there lined up arm-in-arm and we’re going through the respective renditions of the two national anthems.
Australia’s is first and it’s got a wonderful orchestral sound to it.
South Africa follows up and I’ve got to say this is one of my favourite anthems in the world.
Pretty decent crowd in at Cape Town as well, a stark contrast to the first two Tests.
Is Webster the unlucky man in the line-up?
Hi guys. Surely Marnus’s last gasp if he plays ? I’m surprised they kept him in. With Green back I’d have kept Webster instead for more bowling options
– Phillip
I’d say Scott Boland is the one who is INCREDIBLY stiff to miss out today.
If this pitch has a bit in it early doors, then South Africa’s top order will be thanking its lucky stars that Boland is running drinks rather than running in with the red pill.
Australia’s four changes the most in eight years
Incredible stat this.
Australia’s four changes for this Test is the most it has made in between two Tests since it made four changes following the Cape Town Test in 2018 after Steve Smith, David Warner and Cameron Bancroft were suspended.
Smith is certainly not going to have fond memories of this venue at all.
Would Inglis have played if Smith was healthy?
So looking at that , would be interesting to know if Inglis or Labuschagne would have played if Smith had been fit ? I suppose we’ll never know ?
– Phillip
Hi Phillip,
By the sounds of things in the lead-up, I think Marnus would have played regardless of the Smith injury.
Is Newlands the most picturesque ground in world cricket?
Start the debate now…
Loading Instagram content
‘It’s a great opportunity for us’: Pat Cummins
Here’s Australian skipper Pat Cummins, who has been speaking to ABC Sport in Cape Town about the challenge that lies ahead for his team.
Loading Instagram content
The two confirmed playing XIs for the Cape Town Test
Here’s a look at how the two teams will line up in Cape Town.
AUSTRALIA: 1. Travis Head, 2. Matt Renshaw, 3. Marnus Labuschagne, 4. Cameron Green, 5. Josh Inglis, 6. Alex Carey (WK), 7. Cooper Connolly, 8. Pat Cummins (C), 9. Mitchell Starc, 10. Nathan Lyon, 11. Josh Hazlewood
SOUTH AFRICA: 1. Aiden Markram, 2. Marques Ackerman, 3. David Bedingham, 4. Temba Bavuma (C), 5. Matthew Breetzke, 6. Ryan Rickelton (WK), 7. Wiaan Mulder, 8. Marco Jansen, 9. Simon Harmer, 10. Gerald Coetzee, 11. Kagiso Rabada
Series win ‘a stepping stone’ for South Africa
Claiming victory on home soil against the number one-ranked Aussies would be a huge moment for the South African team.
Temba Bavuma told ABC Sport that doing so would put his side on the path to where they want to be as a side.
Loading Instagram content
Hey, you never know, winning this series might even make the board arrange more regular Test matches for the Proteas…
Australia to field first after winning toss, Inglis in for Smith
Pat Cummins has won the toss and has elected to bowl first and he confirms Steve Smith will miss this Test.
Cummins says Smith “had a little try this morning” but wasn’t quite happy with how he was able to move.
Josh Inglis is the replacement for Smith while Nathan Lyon, Cooper Connolly and Cam Green are the other inclusions, replacing Beau Webster, Nic Maddinson and Scott Boland.
Cummins says it was “very tough” to leave Boland out after his performance in Gqeberha.
Phil Jaques pumped for ‘era defining’ Test and ‘grandstand finish’
Loading Instagram content
Bat and ball not the only thing Australia will battle in Cape Town
More than just Kagiso Rabada’s thunderbolts.
More than the teasing loop of Simon Harmer’s off spin.
More, even, than the broad bat of gutsy skipper Temba Bavuma.
This third Test, played in the shadow of Table Mountain, has ghosts lurking around every corner.
Memories of some of the Australian Test team’s worst cricketing moments this century.
It could make for a battle beyond just bat and ball.
When does Australia’s line-up get confirmed?
Hi Simon and Chris, counting down the minutes till the first ball! When does each team lineup get usually announced? A predicted no Steve Smith has left a large gap for the Aussies to try and fill.
– Cam
Hi Cam,
The two playing XIs will be confirmed by the captains Pat Cummins and Temba Bavuma at the coin toss.
The coin toss will take place at 7pm AEDT, just under 15 minutes from now.
Newlands, Cape Town
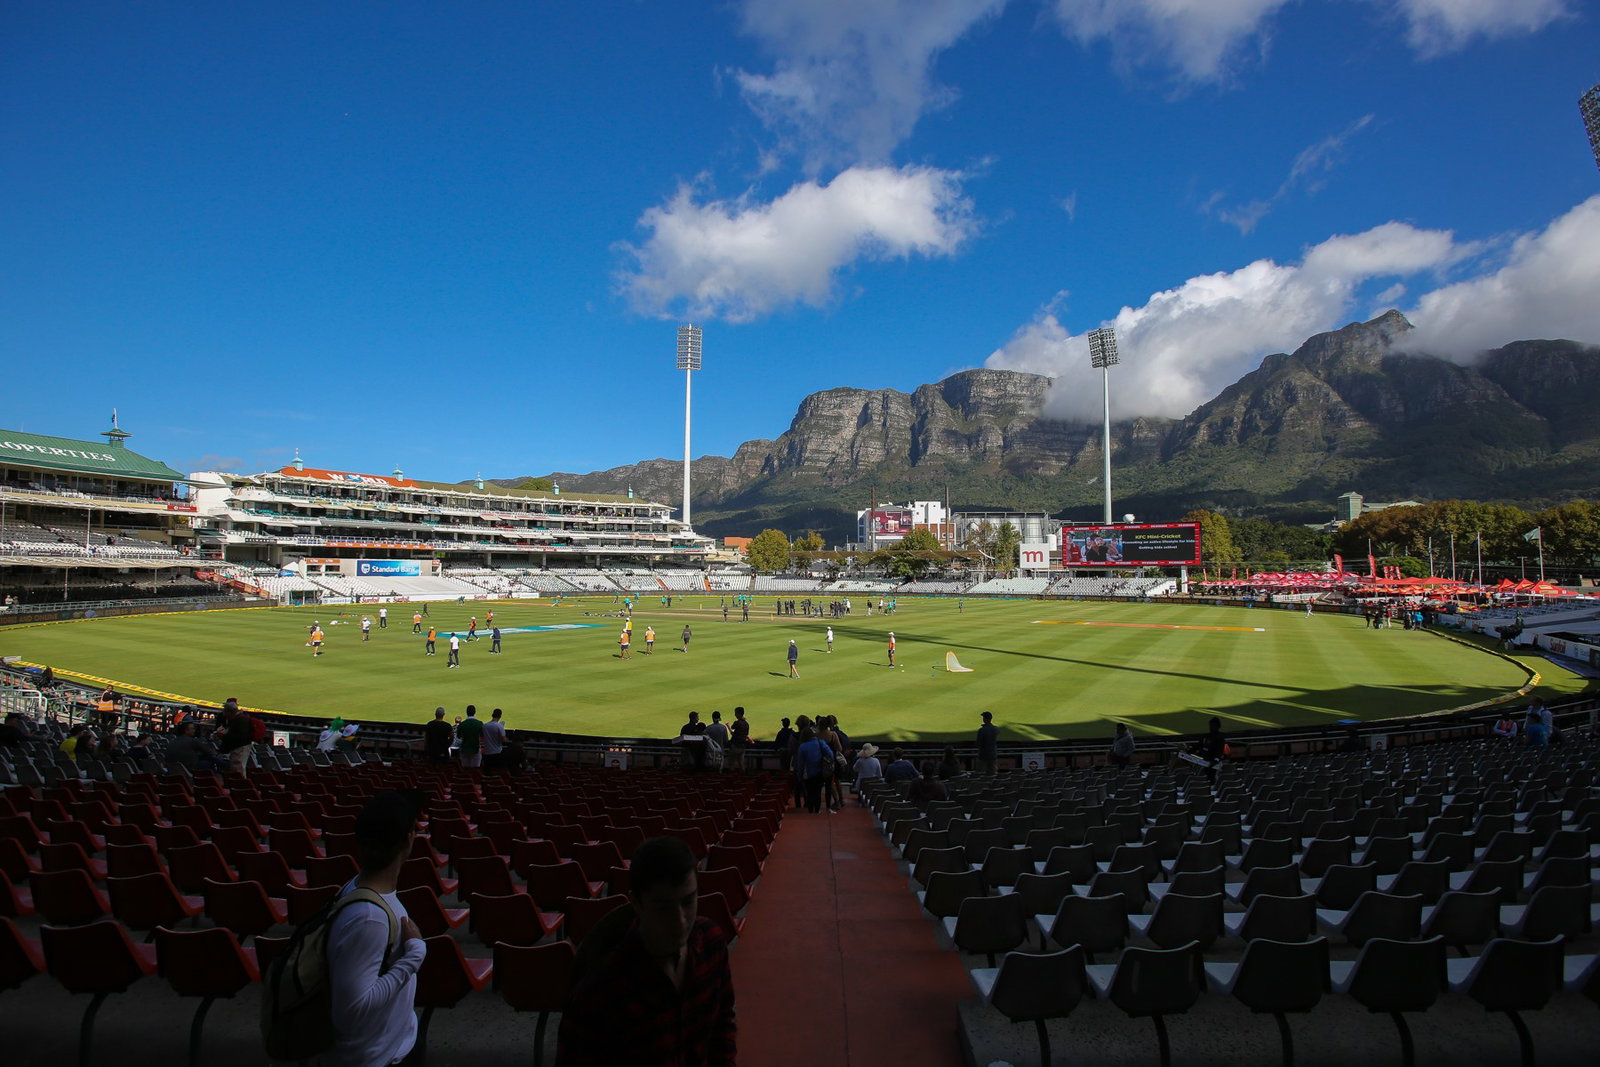
Is this arguably the most beautiful cricket ground in the world?
Members of the South Australian Cricket Association will likely disagree, as will those of the Himachal Pradesh Cricket Association.
But why quibble? Nobody can with Newlands’ awe-inspiring vista, the 1,000-metre majesty of Table Mountain a towering symbol of nature’s awesome scale and grace.
Test cricket has been played at Newlands since March 1889 – this is the 62nd time South Africa will play a red-ball match at the home of Western Province.

No man has scored more runs here than Jacques Kallis, whose 2,181 Test runs includes a 224 effort against Sri Lanka in 2012.
Graeme Pollock‘s 209 in 1966 is the highest score against Australia at the ground, with Neil Harvey‘s 178 in 1949 the best by an Aussie here.
Dale Steyn is the most prolific wicket taker at the ground with 74, but Kagiso Rabada has 52 in the nine matches he’s played, with a best of 6/55. His average of 21.55 and a strike rate of 34.25.
Australia has played 14 times at Newlands since first visiting in 1902. They’ve won 10 of them.
Five of those victories came in the seven Tests held before 1970 and South Africa’s international exclusion.
Since then, the ledger has flipped, with the Proteas winning five of seven.
Australia last won here in 2014, by 245 runs, but that is their only victory in their last four Tests here.
Smith set to be ruled out of the third Test with neck injury
A huge blow for Australia just under an hour from the first ball with Steve Smith now expected to miss the series finale.
It remains to be seen who will come into Australia’s XI.
Smith underwent a series of fitness tests in the lead-up and did another one this morning, but according to Fox Cricket’s Mark Howard, this morning’s test worsened Smith’s condition, rather than improving it.
No Nortje for the final Test
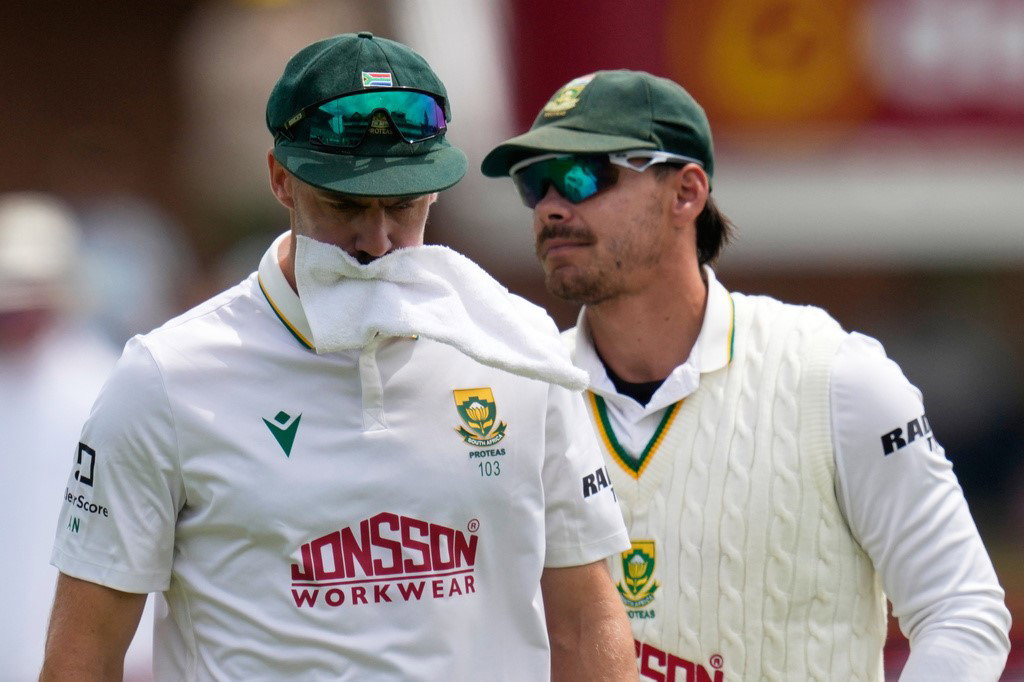
South Africa’s victory in Gqeberha was made all the more remarkable given that Anrich Nortje barely bowled.
He won’t be bowling in Cape Town either.
The hulking paceman suffered a groin injury in his first bowling spell, and has subsequently been ruled out of the final Test.
The Proteas have not named a replacement in the squad.
Nortje had not played a red-ball match in more than three-and-a-half years before the first Test in Durban.
He proceeded to bowl an energy-sapping 40 overs in that match, which took its toll on the 32-year-old.
South Africa’s options include bringing Gerald Coetzee, Corbin Bosch or Dane Paterson into the team.
However, given the Newlands surface’s propensity to take spin, left-arm spin-bowling allrounder Senuran Muthusamy could be an option as well.
What time is the first ball?
Here are the session times for this Test.
- Morning session: 7:30pm – 9:30pm (AEDT)
- Afternoon session: 10:10pm – 12:10am (AEDT)
- Evening session: 12:30am – 2:30am* (AEDT)
So, that 7:30pm start time is the case for New South Wales, the ACT, Victoria and Tasmania.
In South Australia, that start time is 7:00pm.
In Queensland, that start time is 6:30pm.
In the Northern Territory, we’re getting underway at 6:00pm.
In Western Australia, the first ball will be bowled at 4:30pm.
*There is, of course, every likelihood that we play an extra half hour each day, given modern cricket’s inability to cram 90 overs into six hours of action.
Who will be the replacement for Smith?
Great to be here! From the sounds of things Smith won’t play… so Inglis comes in and Labuschagne gets another chance…
– Jeremy
We know for sure that Marnus will be a lock if Smith is unable to go, heck, he might’ve been a lock anyway.
I’d imagine Josh Inglis is probably the man that comes in for Smith, you’re right.
Steve Smith still under injury cloud heading into finale
The big talking point in between the second and third Tests has been the injury status of Steve Smith.
Smith hurt his neck during the first innings in Gqeberha and has undergone multiple fitness tests over the last few days while looking less than comfortable.
His latest came a short while ago.
Australia’s playing XI will be confirmed at the coin toss in just about 25 minutes’ time.
Loading Twitter content
Welcome to the decider
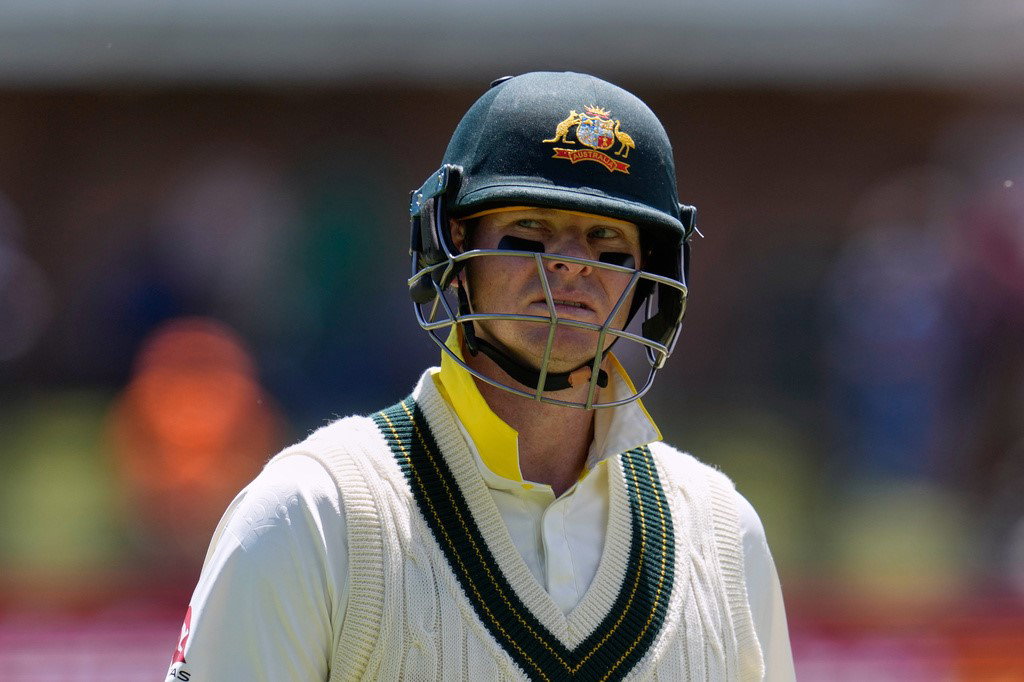
So, it all comes down to this.
One of cricket’s greatest theatres playing host to the final act of a play that has flipped from one way to the next across both stanzas so far.
It’s got all the hallmarks of a thriller.
It’s a pleasure to be here to talk all about it with you.
Hello everyone and welcome to the ABC Sport coverage of the third and final Test between Australia and South Africa!
The ABC commentary team are on location in Cape Town, and the blogging team are here with you into the night here in Australia.
My name is Simon Smale, Chris de Silva is here with me and Henry Hanson is also on hand to keep us all honest.
It goes without saying that it is a pleasure to be with you and I hope you enjoy the coverage.
dan